
It may take a few minutes for all the photos to load, so go hotten your coffee...
Head First
Got the clay and tools? Good! Let’s get started!
We’re going to sculpt a generic theropod head.
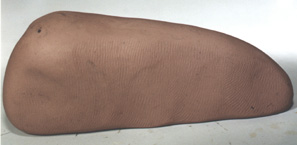
Start with a golf-ball sized piece of clay and roll it to a smooth, round ball. Then roll it between your palms to form a tear-drop shape (Fig. 1)
Next, press the tear-drop against a smooth, flat surface to flatten one side. (Fig 2)
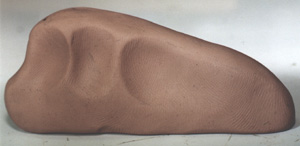
Using thumb and forefinger, press indentations into the clay conforming to the skull openings (fenestra) found on a theropod skull. To keep the indentations uniform, press the clay, then turn the piece 180 degrees and press again. (Fig 3)
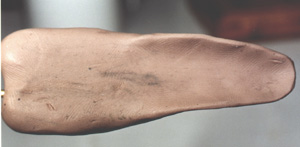
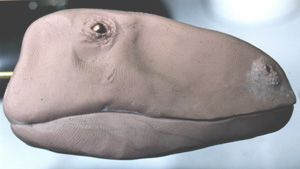
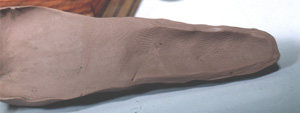
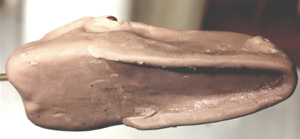
This upper view shows the ‘arrow-head’ shape we’re striving for. Notice the slight notch at the wide end of the piece. (Fig 4)
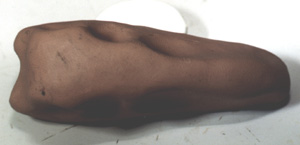
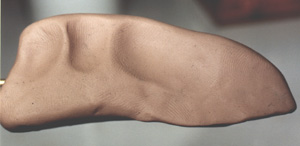
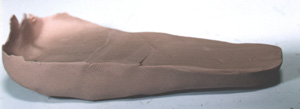
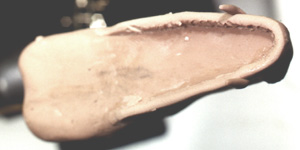
Now, pick the piece up and turn it over to the flat side. This will become the roof of the mouth. Using thumb and forefinger, pinch a ridge along the outside edge of the narrow front half of the piece, thus creating the upper jaw-line. (Fig 5)
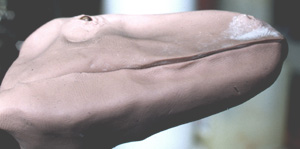
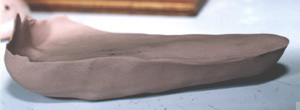
Here’s a side view of what you should have (Fig 6)
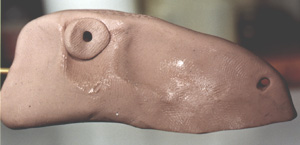
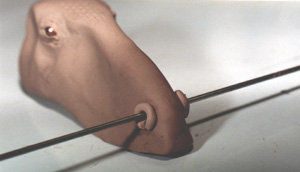
Next, we make the pilot holes for the eyes and nostrils. Using reference materials or just eye-balling it, make a mark in the clay where you want the eyes and nostrils to be located. Run the 1/8" knitting needle right through the piece. Examine it from the top and the front to make certain that the needle is level, thus assuring the eyes holes are exactly opposite. Using the 1/16" needle, do the same for the nostrils. (Fig 7)
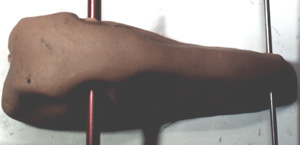
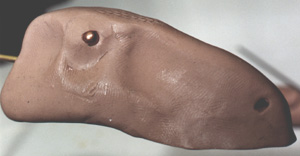
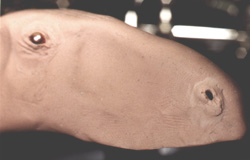
Here’s a side view of the eye and nostril positions. (Fig 8)
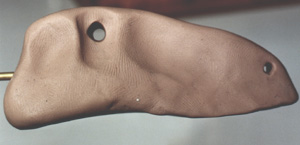
Using the 1/8 inch needle, make a hole in the back of the head aproximately 1" deep. This will enable you to insert a wire to support the head while baking and to insert a wire for the neck.
One more step and we’re ready to bake! Using the utility knife blade, carefully trim off enough clay to form a flat surface along the jaw-line. (Fig 9)

Pop it into a conventional oven, toaster oven, pan of boiling water for 10-15 minutes. Allow to cool before removing.
Now that we have a firm foundation to work with, let’s add some details.
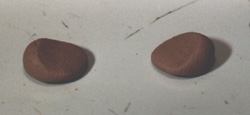
We will first add the eyes. Roll a snake of clay, or extrude one out of the clay gun. Cut a uniform section approximately 1/2 inch long and then cut that piece in half. Roll the two equal pieces into balls, and then flatten them to form wedge-shaped disks. (Fig10)
Using a finger tip, apply a small amount of Vaseline to the area around the eye and wipe off any excess. Press one flattened disk on either side of the head over the eye holes, with the thicker edge of the disk towards the back of the head. Using the 1/16" needle, run another guide hole through the disks, sighting from top and front to make sure the holes are uniform. (Fig 11)
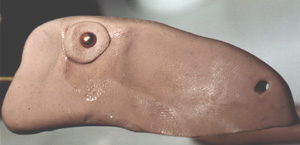
Now, press a BB into each guide hole far enough into the clay to firmly seat it. Check from the top and front again to be sure the eyes are positioned correctly. (Fig 12).
Now blend the outer edges of the clay disks into the surrounding area. (Fig 13).
Use the 1/16" needle to carefully push some of the surrounding clay over the BBs to form eye lids. This may take a few tries, but practice and patience will reward you! (Fig14)
Now for the nostrils. Insert the 1/16" needle through the nostril holes. Roll out a snake of clay approximately 1/16" to 1/8" thick. Cut off two pieces around 1/2" long. Apply some Vaseline to the area around the nostril guide holes. Coil the pieces around the needle and trim off the excess. Press the coiled clay against the area around the nostrils and withdraw the needle. (Fig 15).
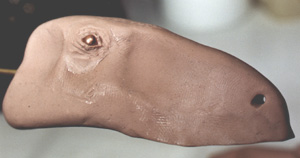
Blend the clay into the surrounding area and texture the clay using a texture stamp. (Fig 16).
Now bake same as before.
Note: The texture stamp I’m using for this project was made by lifting the pattern off the lid of a Rubbermaid Garbage can! It’s a perfect, pebbly texture! So run right out and get one! Your neighbors will love you for it!
The next stage is forming the lower jaw, and here you have to take a decision: Open or closed mouth?
We’ll look at the closed option first.
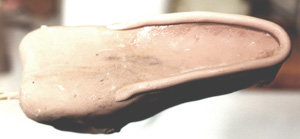
First, coat the bottom of the baked head (the part that conforms to the roof of the mouth) with powder. You do NOT want the clay to adhere to it! Now take a wad of clay and press it into the upper mouth, making sure to leave at least half the width of the flattened upper jaw line exposed. (Fig 17)
Once you have fitted and shaped the lower jaw so that it looks correct, press the texture stamp along the sides to produce what you see here: (Fig 18)
Carefully remove the lower jaw and set aside. DO NOT BAKE IT!!!
Now let’s look at the open mouth option.
Do the same thing you did to form the closed version and remove. (Fig 19)
Using thumb and forefinger, press a ridge along the jaw line. (Fig 20)
And trim off enough clay to form a flat surface (Fig 21)
Bake and set aside.
Okay, now the fun part! Installing the teeth! I mean, what’s a theropod without teeth? (If you answered ‘an ostrich’ you get 10 points!)
Starting with the upper jaw, coat the flat jaw-line and the sides of the head with a thin coat of Vaseline, wiping off the excess. Roll out or extrude a 1/8" snake of clay and apply it to the jaw line (Fig 22).
Using your finger tips and knitting needles, blend the snake of clay into the surrounding area thoroughly (Fig 23)
Set aside..DO NOT BAKE!
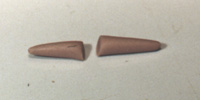
Roll another 1/8" snake of clay and cut off a 1/2 inch piece. roll the ends of the piece against to work surface to form slightly rounded points and cut down the middle.(Fig 24)
The resulting two teeth are then positioned on opposite sides of the upper jaw. There should be enough clay on the end opposite the point to press firmly against the baked portion of the head. Use a knitting needle to blend the tooth into the unbaked clay lining the jaw. (Fig 25)
When positioning the teeth, be sure they initially point slightly forward. Once attached firmly and blended, they will curve nicely with just a tiny about of backward pressure using a needle tip.(Fig 26)
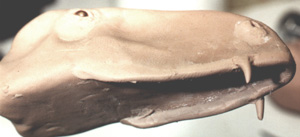
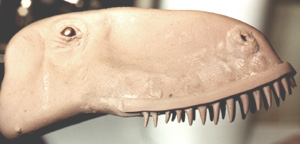
Continue adding teeth until you are satisfied with the look. (Fig 27)

Now either flatten a snake of clay slightly to form a ribbon or extrude one with the clay gun. Apply it along the jaw line. (Fig 28).
Blend the ribbon against the side of the head and also around the base of each tooth, so that the teeth are embedded in clay.
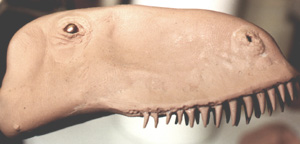
Bake it!!!!