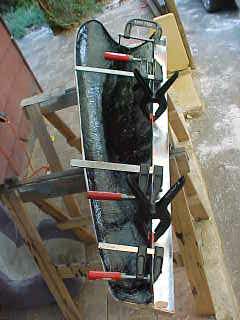
3 March 2001 - Trial fitting of Perry's Nosecone,
needed some trimming and spray putty, then wet sanded and painted it 'Holts
PS105' Gloss Black (used a spray can of acrylic) - have too leave it 7
days to harden before compounding.
5 March 2001 - Alex (2 year old) took to painted
nosecone with cordless drill -huge scratches (aaarghh!!!), more wet
sanding, priming, painting, wet sanding (had enough for a while). Fitted
the indicators and lights for some encouragement:
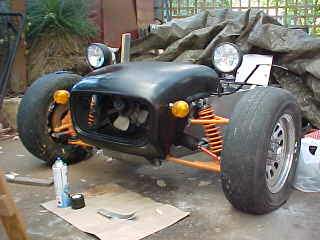 note can
of spray paint, and 'shiny' patch on left hand side of the nose.
note can
of spray paint, and 'shiny' patch on left hand side of the nose.
6 March 2001 - Flared guards are too narrow and don't
cover the wheels!!! They must be for an early Series Lotus Seven. This
ali channel (50mm by 25mm) will act as a spacer. Its bonded in with Sikaflex
252, and rivets, as well as body filler:
18 March 2001 Whiteman Park Classic car Showclick on this linkwork on the car may slow down a bit - when we got home from the show, the dog was sick. Has cost $1000 to get a stone it had swallowed out of it intestine.
5 April 2001 - My name mentioned in an article in The Australian Newspaper motoring section, then interviewed by Ted Bull on local ABC radio. First Club meeting tonight, started 7.30pm, thrown out of Rec Centre at 10pm, we were still talking in the carpark at 11pm! Decided to call ourselves a 'Group' rather than 'Club', as we won't be having awards nights, and dinners for some time...
27 April 2001 Moved car to Barrie Nelson's workshop (it's a top shed!) and started installation of brake pipes. Will be a mix of metric and imperial. Be warned the rear right hand side pipe has some tricky tight turns! On Sunday 30 April Barry even did a quick wheel alignment, it's much easier to push the car around now.
20 May 2001 - fingers crossed, sent of fax (... I was too scared to actually ring them)to DoT telling them I'm ready for first 'rolling chassis inspection, as advised in their letter of March 1998' (yes, 1998!!!!).
26 May 2001The Bump Steer BBQ at Barries! Nothing got cooked, but we put my car on the wheel alignment gear again, and checked the bump steer. 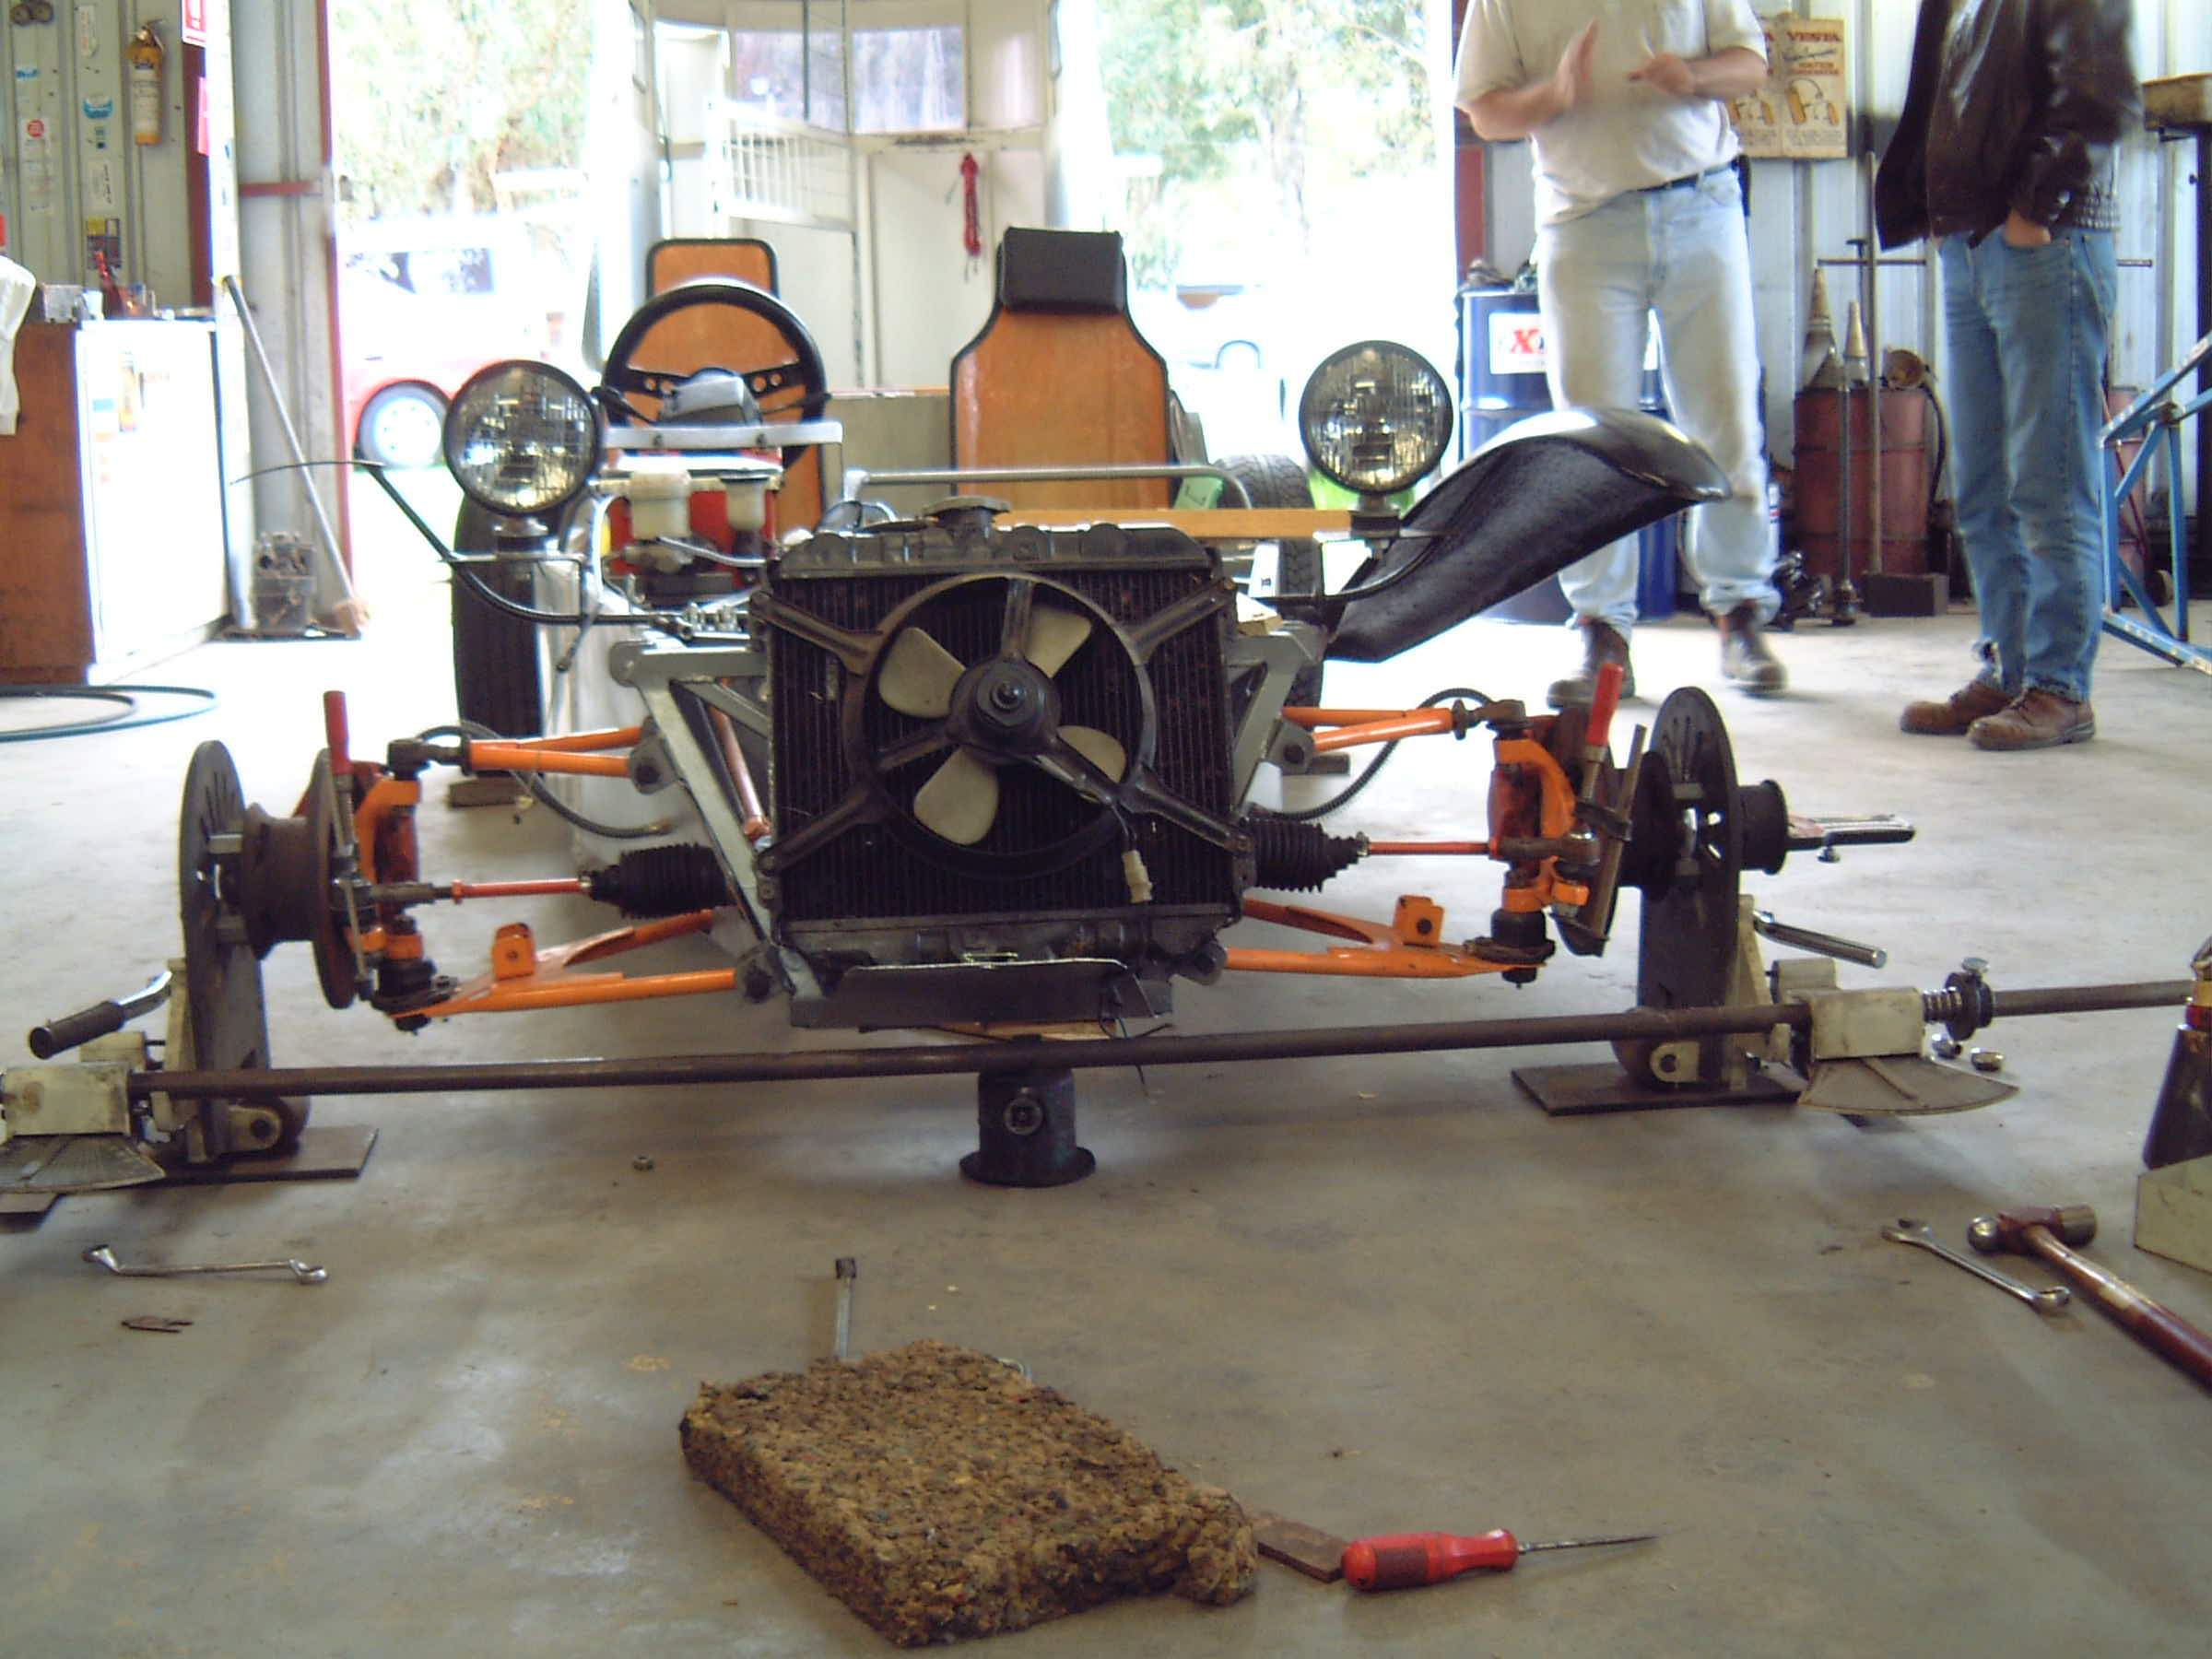 Require a max of 2mm toe-in/out change over the suspension travel - my car had over 10mm!!
We had half a dozen Locost builders from the 'Group' and three chassises under the one roof - even rang Dave King in Sydney for an opinion.
Require a max of 2mm toe-in/out change over the suspension travel - my car had over 10mm!!
We had half a dozen Locost builders from the 'Group' and three chassises under the one roof - even rang Dave King in Sydney for an opinion.
Seems that Jamie Guard changed the steering rack drawings in December last year - the first lot of drawings didn't help bump steer, plus the steering uni-joint wouldn't fit on the mounting.
29 May 2001 Ray Roberts from Department of Transport rang and said my chassis doesn't need a rolling chassis inspection, as the DoT won't inspect it until the car is finished, and an engineer has signed off on it.
August 2001 As well as bump steer, it now seems there is a potential error in the book in relation to Castor. The dimensions on the diagram of the top front suspension wishbone don't match with the diagram very well, this link to the FAQs will explain. Barrie Nelson is now making wide suspension brackets to allow adjustment of the wishbones back and forward to get the settings spot on.
19 September 2001Double gagrage at home is finished, will be moving the Locost back home to fit new brackets and adjust out the camber problem
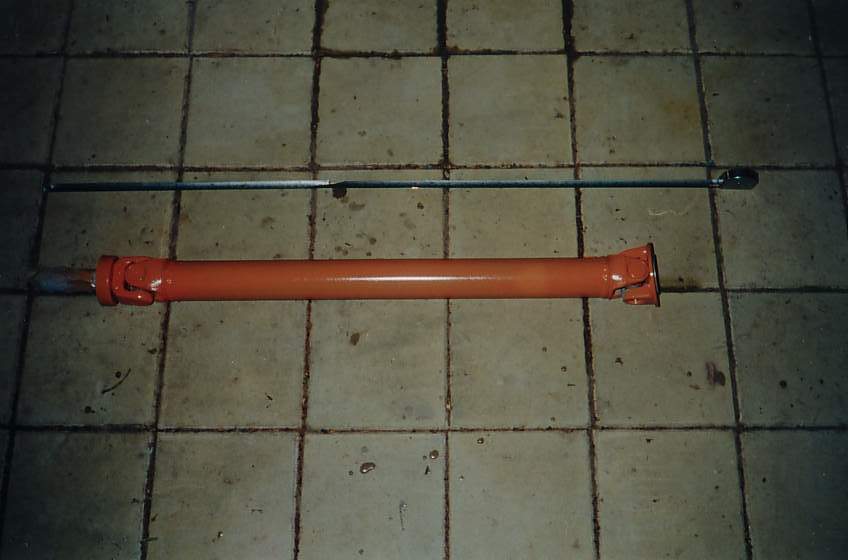
13 January 2002 - Have fitted Trafalgar Service adjustable top wishbone brackets and also finished a home-made prop-shaft. Another Barrie Nelson discovery - if your Locost is standard dimensions, and uses a 4AGE/T-50 and Ford Rear axle, you can use the 2 piece KE70/AE71 Corolla propshaft.
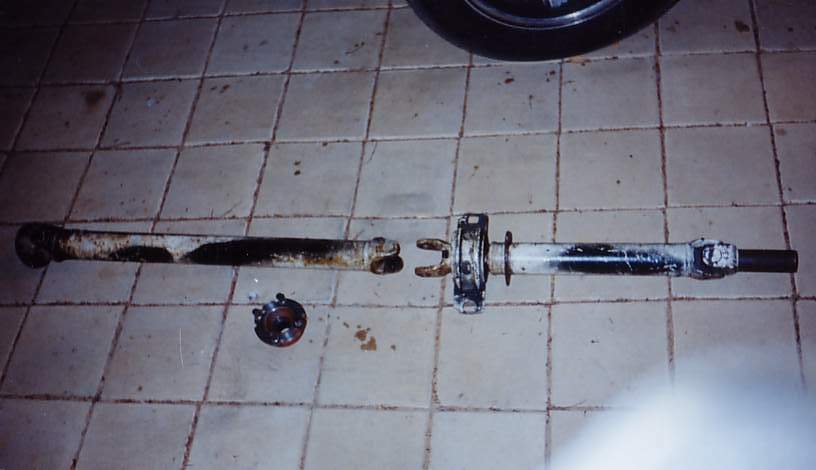 Dismantle the centre U-Joint, and then install the rear half of the propshaft to the yoke that goes into the T-50 gearbox. You then end up with a propshaft that is the correct length (around 710mm between U-J centres - the bricks in the pictures are 200mm by 200mm), already balanced, welded and at virtually no cost (cf $300-500 for custom made). You do need to re-drill the Ford diff flange to the Toyota bolt pattern (shown in the pic above), and cut the threads (M8 x 1.25 is good), some lathe work is also required to widen the circle in the centre of the flange to match the Toyo yoke, and to be neat turn the Ford flange diameter so it matches the Toyota diam (You need a BIG Escort flange, not the little Cortina Mk1/2 I mentioned before - sorry if you following this religiously, see DISCLAIMER on home page).
You could put in new UJs, they are a standard Toyota/Holden part just over $20 each.... oh, and paint the finished product X-15 Orange!
Dismantle the centre U-Joint, and then install the rear half of the propshaft to the yoke that goes into the T-50 gearbox. You then end up with a propshaft that is the correct length (around 710mm between U-J centres - the bricks in the pictures are 200mm by 200mm), already balanced, welded and at virtually no cost (cf $300-500 for custom made). You do need to re-drill the Ford diff flange to the Toyota bolt pattern (shown in the pic above), and cut the threads (M8 x 1.25 is good), some lathe work is also required to widen the circle in the centre of the flange to match the Toyo yoke, and to be neat turn the Ford flange diameter so it matches the Toyota diam (You need a BIG Escort flange, not the little Cortina Mk1/2 I mentioned before - sorry if you following this religiously, see DISCLAIMER on home page).
You could put in new UJs, they are a standard Toyota/Holden part just over $20 each.... oh, and paint the finished product X-15 Orange!
While the flange was out I replaced the Pinion seal, Barrie reckons it is possible to take out the 'collapsible spacer', flatten out the 'collapsed' bit with some gentle hammer work, and the reinstall the pinion flange nut snuggly, without all the mucky-muck of preloads, spring balances, strings that all the manuals talk about (I've swapped flanges so many times I can't remember how many turns of the ratchet and foot pounds I was supposed to apply...). The flange is still a bit wobbly, so needs to be tightened further.
16 March 2002 My car is again the star of the Wandi Progress Association fair, as it spent the day at Trafalgar Services display. Next day was the Whiteman park show, but I took David Machin's Leitch.Also got my Locost insured by Shannons, cost $220 for laid up cover. Not much more done for a while as car ended up at top of the driveway, not in the big garage.
15 April 2002 fitted handbrake, chose the Leitch location (on the passenger side floor next to tunnel), I am using a Toyota Corrolla lever and cables (KE30 model, but seems the same set up in the 2001 model AE112). I had to shorten the cables, but couldn't drill a hole in the round metal 'ferrule'- the drill bit kept wandering, so i found a piece of steel rod the same diameter (actually a tent peg) and drilled a hole. It was easier to drill after I ground a 'flat'. Put it together and it seems to work! The handbrake was fouling on the tunnel so I used heat from the Primus torch to bend the handbrake shaft about 25mm. The workings all seized up, but I flooded the inside with Penrite 50/W70 and grease and it started working again(maybe it was just the different metals inside cooling down). After painting the handle X-15 orange and slipping the rubber grip back on, I will be able to roll the car down the driveway into the garage.
May 2002 Took a week off work to do the car, but blew a ganglion in my wrist on the first day - perservered one handed, and got the plumbing of the engine 'roughed out'. The intention being to get the car driving so I can go through the torsion-bending test.
June 2002 Started on the wiring and got side tracked into doing some trimming - funny how these things happen! I think it's because I needed to have the dash trimmed to fit the instruments, which is basically the stock pod from a Corolla - using the 'stock' instruments was supposed to be easy (but of course it wasn't!).
July 2002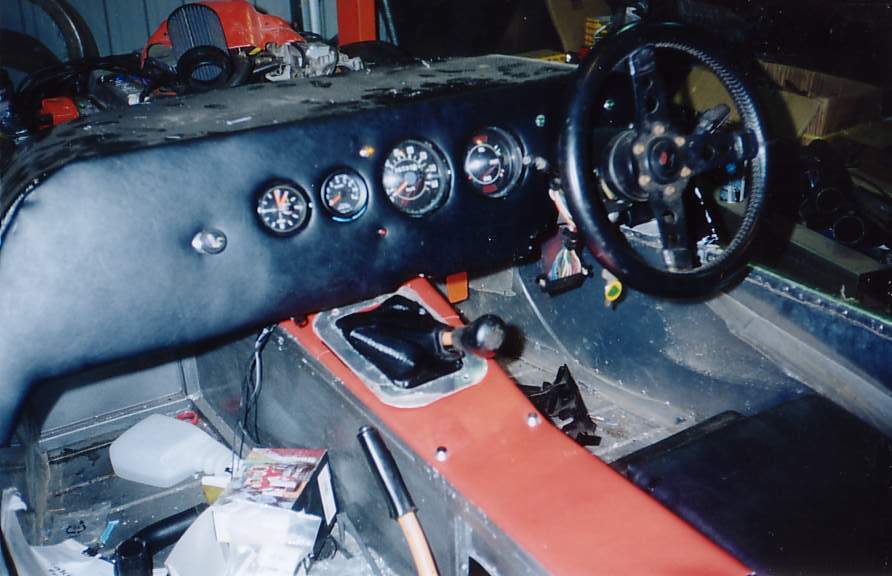
AUGUST 2002 - Fitted 5 Bridgestone Eager Tyres 205x60 by 13s. Finding 185/60s through Beaurepaires (I wanted some Frequent Flyer points!) proved difficult. The 205s just fit inside the rear suspension arms, may need a spacer, Eagers are not the most sophisticated tyres but should be a good start (and they have white letters - woohoo!).
21 September 2002 - called Dad up from Mandurah assist with the wiring, joining a 1974 Corolla loom to a 1986 Corolla loom was starting to look as easy as recycling the instrument panel. Mum came out later in the afternoon, looked at the spaghetti network and reminded me that Dad is slightly colour blind .... anyway Starter motor and Alternator circuits are nearly sorted, the rest should fall into place.
OCTOBER 2002 - visited Sydney and went for a ride in George Tonna's Locost, and checked out Dave King's progress.
NOVEMBER 2002 - making progress with the wiring. ECU wiring is nearly there (all the computer relays 'click', still not game to plug in the ECU yet!). Horn 'beeps', fuel pump 'whirrs' and some lights 'flash', so there are signs of life!
PJANUARY 2003 It's taken three months of frustration, but I now have an alternator light! Much of the alternator light stuffing around was due to some incorrect 'abbreviations' at a website talking about putting a Nissan Denso alternator into a Spitfire (the rusty little car I presume, not the plane, but I won't memtion the website just in case he will fly from England and strafe my house...) - don't religiously follow everything you see on the Web (especially this site! read the disclaimer below, I am not the Messiah!). Also finished headlights, rad fan, horns now go through a relay, and park lights ('Mark 2' - external Narva lamps, after a melt-down from 'version 1', the globes didn't like being inside the headlamp bowls). Also now much of the 'spaghetti' has gone and chaos no longer rules.... well apart from the 'engine' loom which is my next task.
JUNE 2003 Can't be 5 months since last update! A few months back I took the car to Martin and Daniel Simms (engineers) who were generally happy with what they saw. They told me to weld gussetts to the front suspension brackets and get rid of the dodgy 'adjustable' (by a bit of threaded rod from the hardware) panhard rod. Getting closer, been short of money, so tried to use up parts and materials I have been accumulating before buying new stuff - so the engine bay is fitted out, cutting and shutting the scuttle and nosecone to fit. Did some ali bending for the rear panel, fitted fuel filler, reversing light and high level brake light. Must be time to add some photos, as it's starting to look like a car ...
7 JULY 2003 Had a week off work, checked all the engine wiring, filled everything up with fluids, but enegine wouldn't start. Fuel injectors rrequired cleaning. The engine started and it moved under it's own power!! But I had to shut it down, as there was no oil pressure... then the starter motor solenoid packed in after all the switching on and off ...
8 AUGUST 2003 Has taken this long to get a solenoid for the starter motor, seems I have a starter motor that is both 'old' and 'Japanese' which means parts are scarce and expensive compared to an Aussie-made Bosch starter, for which parts are available from any fish and chip shop.... now install the starter and then I can diagnose the lack of oil pressure ....
>LATEST ENTRY: Seemed to have missed a few entrys???.FEBRUARY 2005 Had to widen front guards to cover wheels, therefore had to make new brackets for guards and headlights. Interior is noow carpeted, seats are padded (Clark Rubber 'autofoam' cut into 'cushions' cable-tied to seat shells, any exposed fibreglass covered with polyester 'quilting' from Spotlight). Seats need covers put on, but one bolt on front seat siezed in the hole. Can't pull it out using brute force as fibregless seat may break - will have to wait until car can be pulled out of garage and jacked up enough to swing a hammer and drift. Started working on exhaust system. This will be 2.5 inch pipe, which is almost exactly the same size as bottom of cast iron manifold (cut of the braided 'flexi' pipe). Bought some 2.5 inch 180 degree bends from Finn-Ex, in Bentley. Cat converter is standard Holden V6/V8 as this is 2.5 inch. Muffler is a standard rear Muffler (round 22 inch long, 6 inch diameter) from a Commodore, which may be restrictive, but is known to reduce noise levels to comply with ADR 28.
REMINDER - DISCLAIMER: I make no claim or warranty as to the legality, safety and appropriateness in all situations and jurisdictions of the information on this entire web site, and recommend you seek your own professional, legal or engineering advice on these matters
Links to: