|
|
|||||||||||
|
|
|
|
|
|
|
|
|
|
|
|
|
|
|
|
|
|
|
|
|
|
|
|
||
|
|
|
|
|
|
|
|
|
|
|
||
|
|
|
|
|
|
|
|
|
|
|
||
|
|
|
|
|
|
|
|
|
|
|
||
|
|
|
|
|
|
|
|
|
|
|
||
|
|
|
|
|
|
|
|
|
|
|
||
|
|
|
|
|
|
|
|
|
|
|
||
|
|
|
|
|
|
|
|
|
|
|
||
|
|
|
|
|
|
|
|
|
|
|
||
|
|
|||||||||||
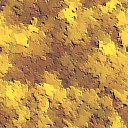
 yello005.jpg 128 x 128 |
 red014.jpg 96 x 96 |
 wood008.jpg 96 x 96 |
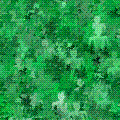
 green041.gif 120 x 120 |
Solid yellow block is bgcolor="#FFCC66" |
Copy the backgrounds graphics files into your backgrounds folder and make sure you have a copy of the 1x1.gif spacer graphic from the Using Tables chapter in your graphics folder. You don't need to copy the solid yellow block. It is there to tell you the bgcolor color number to use in those blocks.
This puzzle is made just like Little Quilt. It has more blocks so you can practice using Cut-and-Paste and Copy-and-Paste as we used to copy text from the screen. This makes assembling the puzzles much faster and easier. You can start with border=0 and cellspacing=0 and put the colors and backgrounds in your <td> tags when you write the code to tell the cells apart.
First, set up the table tags and put the first row in. That row has a long cell across the top of the quilt. Count the blocks across, including the side strips as one block each. Your long cell should be 12 columns wide. It uses background="../backgrounds/yello005.jpg". Note that when you display it, it looks one block wide because you haven't defined the twelve blocks in the next row to stretch it open over them. I have the same size spacer in it for convenience in copying the basic cell.
|
|
<table border=0 cellspacing=0 align="center">
<tr>
<td background="../backgrounds/yello005.jpg" colspan=12>
<img src="../graphics/1x1.gif" height=40 width=40>
</td>
</tr>
</table>
Open Notepad and retrieve puzzleform.html. Erase any lines between the <BODY> and </BODY> codes and type in the <table border=0 cellspacing=0 align="center"><tr> and the </tr> </table> tags with a blank line between them. I have align="center" in the table tag to center the table. It centers tables but not necessarily things in tables. Save the file as myautumntintsquilt.html and save it occasionally as you work the puzzle.
The basic cell code is
<td>
<img src="../graphics/1x1.gif" height=40 width=40>
</td>
Copy the basic cell code and paste it in that blank line. Just put the tip of the pointer in front of the first bracket of the cell code on the screen. Hold the left mouse button down and move the pointer to the end of the cell code. Release the button and right click to get the pop-up menu. Click on Copy to save a copy of the code in the computer's memory. Go back to Notepad and click on the blank line to get the cursor back there. Right click for the menu and click on Paste. A copy of the cell code should appear there. Edit it to add the colspan=12 and background="../backgrounds/yello005.jpg" to the <td> tag. Save the file and display it with your browser.
Now add the next row. It has a long side cell on both sides, so count the number of cells along that side without including the top and bottom border strips. The side cells just have to stretch along the blocks between them. There are ten of them, so these side strip cells will need rowspan=10 and background="../backgrounds/yello005.jpg" in their <td> tags. The other cells just need to be added in the correct order with their correct background or bgcolor to fill in the rest of the row.
In Notepad, move the pointer to the end of the first row and click to move the cursor there. Press Enter to open a blank line and type a new <tr> tag, then press Enter again twice. Type a </tr> tag and click on blank line left between these row tags. Tip: Typing a tag and its closing tag like this and then moving back between them helps to keep from forgetting that closing tag.
Now right click to get the menu and click on Paste to get more copies of the basic cell code. Do this twelve times, pressing Enter to separate the cells. Edit each <td> tag to include the rowspan, background, and bgcolor codes as needed for each cell. The first and last cells get rowspan=10 and background="../backgrounds/yello005.jpg" since they are the long side strips. The second cell gets bgcolor="#FFCC66". The third cell gets background="../backgrounds/red014.jpg". The fourth and fifth cells get background="../backgrounds/wood008.jpg". Follow the row shown in the puzzle and fill in the rest of the cells, then save the file and display it on your browser. It should look like this:
|
|
|||||||||||
|
|
|
|
|
|
|
|
|
|
|
|
|
<table border=0 cellspacing=0 align="center">
<tr>
<td background="../backgrounds/yello005.jpg" colspan=12>
<img src="../graphics/1x1.gif" height=40 width=40>
</td>
</tr>
<tr>
<td background="../backgrounds/yello005.jpg" rowspan=10>
<img src="../graphics/1x1.gif" height=40 width=40>
</td>
<td bgcolor="#FFCC66">
<img src="../graphics/1x1.gif" height=40 width=40>
</td>
<td background="../backgrounds/red014.jpg">
<img src="../graphics/1x1.gif" height=40 width=40>
</td>
<td background="../backgrounds/wood008.jpg">
<img src="../graphics/1x1.gif" height=40 width=40>
</td>
<td background="../backgrounds/wood008.jpg">
<img src="../graphics/1x1.gif" height=40 width=40>
</td>
<td bgcolor="#FFCC66">
<img src="../graphics/1x1.gif" height=40 width=40>
</td>
<td background="../backgrounds/yello005.jpg">
<img src="../graphics/1x1.gif" height=40 width=40>
</td>
<td background="../backgrounds/wood008.jpg">
<img src="../graphics/1x1.gif" height=40 width=40>
</td>
<td background="../backgrounds/wood008.jpg">
<img src="../graphics/1x1.gif" height=40 width=40>
</td>
<td bgcolor="#FFCC66">
<img src="../graphics/1x1.gif" height=40 width=40>
</td>
<td background="../backgrounds/green041.gif">
<img src="../graphics/1x1.gif" height=40 width=40>
</td>
<td background="../backgrounds/yello005.jpg" rowspan=10>
<img src="../graphics/1x1.gif" height=40 width=40>
</td>
</tr>
</table>
To make the next row, we only need the ten blocks inside the two long side strips, and we need to swap the bgcolor="#FFCC66" blocks with the red, yellow, or green block next to them. In Notepad, type in the <tr> </tr> tags for this row below the </tr> tag for the last row. Go up to the <td> tag for the first bgcolor="#FFCC66" block and click in front of it to move the I-beam cursor there. Highlight the text for the ten middle blocks and copy it into memory. Move the cursor down to the blank line in the new row and paste a copy of the blocks there. Save the file and display it with your browser to see that you have a second copy of the blocks between the side strips.
To swap the blocks with Cut-and-Paste, put the cursor in front of the <td> tag for the first bgcolor="#FFCC66" block to be moved below the red print block. Highlight the text and right click for the menu. This time, click on Cut. The computer will copy the code into memory and erase the text with a blank line left behind. Backspace to get rid of it and move the cursor to the end of the </td> tag for the red print block. Press Enter to make a new line and right click for the menu. Click on Paste to put the code for the bgcolor="#FFCC66" block in place behind the red print block. Repeat this to swap the two other bgcolor="#FFCC66" blocks with the yellow and green print blocks. Save the file and display it with the browser to make sure it is correct.
Tip: Since you already have a copy of the bgcolor="#FFCC66" block in memory, you could just erase the other two blocks and paste a copy from memory in the right place in the row.
Tip: If you accidentally cut a piece of code instead of copying it, you can paste it back again. If you haven't edited anything else, you can also click on Edit at the top of the Notepad window and click Undo to restore the file as it was before the last edit. This is useful if you start erasing something and decide not to do it after all.
Continue filling in the rows using Copy-and-Paste and Cut-and-Paste where you can to save typing. For example, the next two rows look like the previous two with the solid yellow and red print cell pairs at the beginning removed and a pair of wood print blocks added to the end. You can start at the first wood print block and copy those eight blocks straight from each row into a new row, then copy a pair of wood print blocks at the end. A few swift mouse clicks can replace a huge amount of typing, and you avoid making new typing mistakes, too. This is definitely a good technique to master that is very useful in text editors and word processors.
Don't forget to add the bottom strip to the puzzle with the same row code as the first strip on the top, and you're done! On to HTML Puzzles for the next puzzle and more tips.
Last update: January 12, 2000