|
Cube Pine
Furniture Tutorial |
 |
|
Cube Pine
Furniture Tutorial |
|
|
Pine Furniture was all the rage in the 1960's. One of the ideas for people who were
renting housing was cube furniture. This enabled people to re-arrange settings whenever they
felt like a change. This is a simple tutorial using just 3 cubes.
This tutorial was designed in PSP 6.02 and can be completed in other versions with some adjustment. Have fun. Copyright © by Harold E. Jones .. 2001. |
| Level of difficulty: Intermediate |
|
|
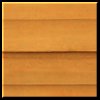
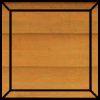
1. Open new image, width="350" height="350", 16.7 million colors, White.
Click on the "Color Options pallet." 2. Go to "image/effects/sculpture" with the following settings:
"Presets=Pine; Size=100%; Smoothness=6; depth=3; ambience=10; shininess=0; color=white;
angle=315; intensity=50; elevation=30." |
 |
| 3. Go to "image/effects/add borders." Apply the following settings: "symetric=checked; size=2; opacity=100." Click Ok. A 2 pixels border will appear around the pine square making it a "width=100 x height=100" image. Go to "File/save as/" and save your work as "pinecube.psp." Save your work often and always in ".psp" extension until the final "save as." | |
|
4. Duplicate the "Pine Cube" twice by pressing keys "Shift+d" two times so that you
now have 3 cubes.
5. Click on the "Color Options pallet." |
|
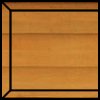
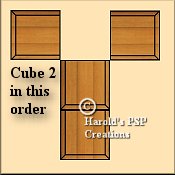
6. Activate one of the "Pine Cubes." Click on your "Preset Shapes Tool,"
7. Start at co-ordinates: w=10 x h=10 and drag down and to the right until you are "outside" the image. This will give you a 10 pixel margin top and bottom inside the cube. |
 |
|
8. Click on the "Drawing Tool" |
|
|
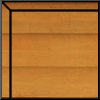
9. Activate a second "Pine Cube." Click on your "Preset Shapes Tool,"
10. Start at co-ordinates: w=10 x h=10 and drag down to height=90 and to the right until you are "outside" the image. This will give you a 10 pixel margin top and bottom and to the left of the inside of the cube. |
 |
|
11. Click on the "Drawing Tool" |
|
|
12. Activate the last one of the "Pine Cubes." Click on your "Preset Shapes Tool,"
13. Start at co-ordinates: w=10 x h=10 and drag down and to the right until you are at co-ordinates w=90 x h=90. This will give you a 10 pixel margin inside the cube. |
 |
|
14. Click on the "Drawing Tool" |
|
|
15. Now that we have the 3 basic "Cubes," we can start putting the "furniture"
together.
16. Open new image, width="350" height="350", 16.7 million colors, transparent. Make sure
the "Layers Option Pallet" 17. Click on the "Flood Fill Tool" 18. Activate the "cube2.psp" image. Go to "selections/select all" and click Ok. Go to "Edit/copy." Activate the "grid" by pressing the keys "alt+v" and scroll down until you come to "grid" and click Ok. The "grid" will appear on the images. |
|
|
19. Activate the main image. With the "color" layer highlighted, go to "Edit/paste/paste as
new layer." The "cube2" will appear on the main image. Click on the "Mover Tool"
20. Make sure that you are still on the new "layer." Right click on this layer and in the box that "pops up," click on "properties" and rename the layer, "top left." Go to "File/save as/" and save your work as "pinecube.psp." |
 |
|
21. Add a new layer and name it "top right." Go to "Edit/paste/paste as selection"
Another "cube2" will appear on the main image. Go to "image/mirror." Click Ok. Click on
the "Mover Tool" 22. Add a new layer and name it "center." Go to "Edit/paste/paste as selection"
Another "cube2" will appear on the main image. Go to "image/rotate/left 90 degrees."
Click Ok. Click on the "Mover Tool" 23. Add a new layer and name it "bottom middle." Go to "Edit/paste/paste as selection"
Another "cube2" will appear on the main image. Go to "image/rotate/left 90 degrees."
Click Ok. Click on the "Mover Tool" |
|
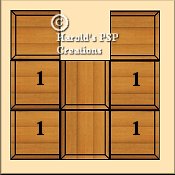
24. Open "cube1" image. Go to "Edit/copy" and press Ok. Make sure
the "Layers Option Pallet" 25. Go to "Edit/paste/paste as selection." The "cube1" will appear on the main image.
Go to "image/rotate/left 90 degrees. Click Ok. Click on the "Mover Tool"
|
 |
|
26. Add a new layer and name it "bottom left." Go to "Edit/paste/paste as selection."
The "cube1" will appear on the main image. Go to "image/rotate/left 90 degrees. Click Ok.
Click on the "Mover Tool" 27. Add a new layer and name it "middle right." Go to "Edit/paste/paste as selection."
Go to "image/rotate/left 90 degrees. Click Ok. Then go to "image/mirror." Click Ok.
The "cube1" will appear on the main image. Click on the "Mover Tool"
28. Add a new layer and name it "bottom right." Go to "Edit/paste/paste as selection."
Go to "image/rotate/left 90 degrees. Click Ok. Then go to "image/mirror." Click Ok.
The "cube1" will appear on the main image. Click on the "Mover Tool"
|
|
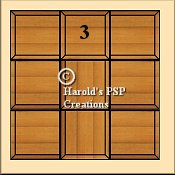
29. Open "cube3" image. Go to "Edit/copy" and press Ok. Make sure
the "Layers Option Pallet" 30. Go to "Edit/paste/paste as selection." The "cube3" will appear on the main image.
Click on the "Mover Tool" |
 |
|
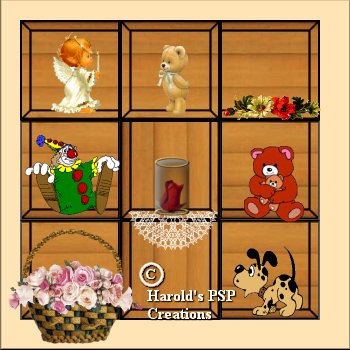
31. You should now have a completed "Cube Shelving" of 9 boxes.
Make sure the "Layers Option Pallet" |
|
| 32. Now is the time to "decorate" your finished furniture. I have placed several different "Tubes" in my cubes. Some I have made myself and others have been sent to me by other folk. Try several placements of your "Tubes" until you are pleased with the result. Enjoy! |
|
33. If you are satisfied with the "white" as a background for your finished "Cubes,"
now is the time to complete your work. Go to "layers/merge/merge all flatten." Click Ok.
Go to "File/save as" and save as a .jpg extension.
34. If you want to have a different type of background for your "Cube Furniture," delete the "color" layer. Activate the transparent or "layer1," and "flood fill" with a pattern of your choice. Then go to "layers/merge/merge all flatten." Click Ok. Go to "File/save as" and save as a .jpg extension. |
|
Congratulations! You have finished. Now you can use your talents and design many other different settings for "Pine Cube Furniture." |
| This tutorial is written by Harold E. Jones.
Other than for personal use, No part of this tutorial maybe copied or reproduced
For further information, please E-mail me. |