
Navigation Bar Tutorial #2, page 2:
We'll start by creating the two shapes that make up the upper and bottom layers. They are both identical, so all I'm really going to do is to create one, then copy it.
Click on the INSERT
SHAPE ![]() icon on the toolbar, and select the one that looks like
this parallelogram below:
icon on the toolbar, and select the one that looks like
this parallelogram below:


Again, I'm making this smaller for the purpose of demonstration so that this page will load quicker.
Now, with the object still selected,
click on the FILL COLOR ![]() icon, then choose MORE. At this point you
can choose a color you like, or click on the picture tab and fill it with a
picture, or image, from your hard drive. The images below are thumbnails. Click
on either one to see the full size version, then use your BACK button to return
here.
icon, then choose MORE. At this point you
can choose a color you like, or click on the picture tab and fill it with a
picture, or image, from your hard drive. The images below are thumbnails. Click
on either one to see the full size version, then use your BACK button to return
here.

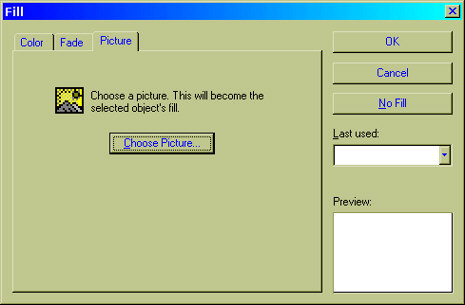
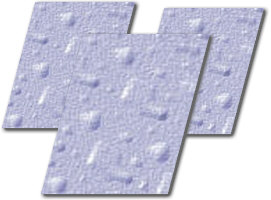
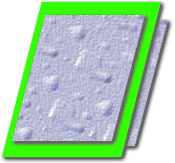
For now, I've chosen to fill it with the texture you see below. I simply clicked on the PICTURE tab, then chose an image of a texture that I had on my hard drive that I wanted to fill the object with.

Check out Page 2 of the BUTTONS tutorial to see more of what you can do with NetStudio by filling objects with images.
You may have noticed that I've also added a shadow to our image. Since I covered shadows in the previous tutorial, I won't discuss how to do that here. Now, copy this object and paste its twin into your workspace. You can cut-and-paste just like you do in your word processing program. You can use the icons on the toolbar, or the COPY and PASTE commands from the edit menu, or (for Windows users) you can right-click on the object to copy it, then right-click to paste it. You can also use Control+C to copy and Control+V to paste in Windows. On a Mac? Well, I have no idea... Anyway, you should now have two identical images like the one above.
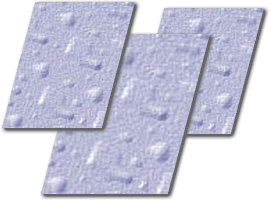
Now, you're going to create a third, similar to these two. The third one will be the meat in the sandwich we're going to make. Again, click on the INSERT SHAPE icon and choose the same shape as the parallelogram that we've already made. You'll notice that NetStudio remembered the settings of the last object and you should now have three identical parallelograms. We want to make the middle piece slightly bigger than the two outer ones, however, so we're going to enlarge it slightly. Grab one of the corner borders of the box that surrounds the selected object and drag it outwards to make it a little bigger. Don't resize it by grabbing the sides, top, or bottom, because that will only make it wider or taller. You want to keep the proportions the same as the other two images. If you go too far, or not far enough, just keep dragging until you get something that's just slightly larger than the other two. Sort of like this:
Now, move them around and line them up until you get a sandwich, like the finished image you saw at the beginning of the tutorial. You may notice a potential problem, as in the image above. The biggest of the three objects is also the top layer. That is, no matter how much I move them around, the biggest one always looks like it's resting on top of the other two, when I want it to look like it's in the middle.
There's a simple solution: If you want to move an object's level in relationship to the other objects, select the object you want, then choose TOOLS from the menu. You can then choose SEND BACKWARD or BRING FORWARD in order to move the object up or down in its relationship to the other layers. If one of those options is grayed-out on your menu, it means that the object is either as far up, or as far down as it can go in relationship to the others. In this case, I've selected one of the two smaller parallelograms and moved it forward one layer, so that I now have this:
Before I line them up and make my sandwich, I'm going to want to change the look of the middle object. Again, I can fill it with a color or an image. Another option is to still keep the fill the same, but to alter the color slightly.
You may have discovered the CHANGE COLOR ![]() icon just two
positions to the right of the FILL COLOR icon in NetStudio's toolbar. By
clicking that icon, I can change the color of the selected object without
changing the actual fill. For example, I can take one of the objects above and
make it look like this:
icon just two
positions to the right of the FILL COLOR icon in NetStudio's toolbar. By
clicking that icon, I can change the color of the selected object without
changing the actual fill. For example, I can take one of the objects above and
make it look like this:
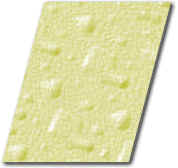
But, let's just say I want a solid color, and I've chosen green. Now I've filled the middle object with solid green, and I've positioned them into place so that they look like this:
Now we'll finish it off. Click the NEXT button to continue...


![]()
![]()
Home Navigation Bars Buttons Backgrounds Cool Tricks Next Page