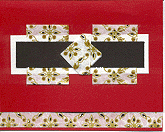


There are meany different techniques you can use when making cards, folding, (origami) embossing, layering (with puffy tape) quilling, punch art, the list is endless.
Here you will find some tips, examples and templates. If you have any ideas or suggestions please feel free to e-mail me with them.
Page 3
Page 1
Page 2
1. Yellow a newspaper clipping in the sun and tear the edges to use as a backdrop on a card, stamp directly onto newspaper or layer with another image.
2. Use beads, buttons, tassles, or other small embelishments to create a more personal 3-D card.
3. Use punchies (see scrapbook page) to create a punch art card.
4. Gently ink the sides of a card or a layer on a card to give it dimension.
5. Layer your card front with different colors of card stock to give it dimension or pull out colors from a stamped image.
6. Use different textured paper to create effect on your page. i.e., velvet, mullberry, newspaper, cloth, vellum, 3D tape.
1. Use a leaf by inking up one side and pressing it down on a piece of card stock, be sure to ink up the leaf well.
2. Dry your leaves to preserve their color, try drying them between folded wax paper and press in a large book. When dry spray with a sealer, or with a colored spray paint.
3. Use a leaf as a paintbrush.
4. crumple up a piece of paper, dab in ink and press onto a card for a background image.
5. Put multiple rubberbands on a brayer, roll in ink and run along cardstock as a background.
Take an envelope and seal it, cut it in half using decorative scissors, stamp up both sides of the envelope using decorative stamps and color, fold in the side and bottom edges of the envelope about a half inch, fold them in both directions. Then stick your hand in and puff it out, the envelope will start to form a bag, fold up the bottom and glue, there you have it, you can close your goodies in with raffia or ribbon or just fold it over!
You can use an envelope template to create a c.d. envelope, just add 1/3rd of an inch to each fold to make it the width of a c.d. (see templates page)