by Chris Cork
Modelling is always something of a challenge here in Pakistan. The biggest challenges being dust, heat, humidity in the right season, and the lack of an airbrush.
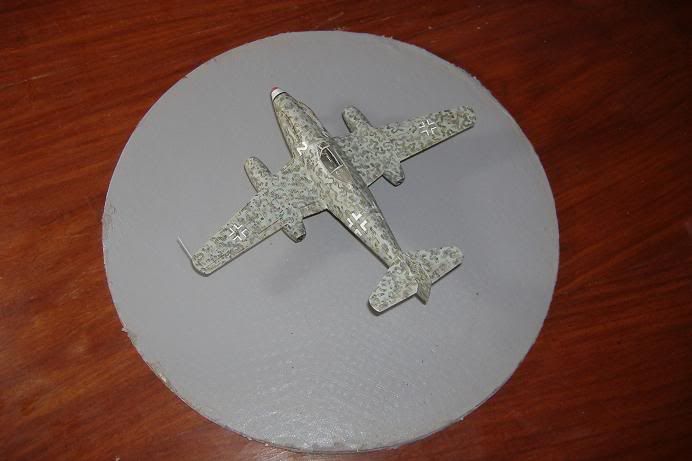
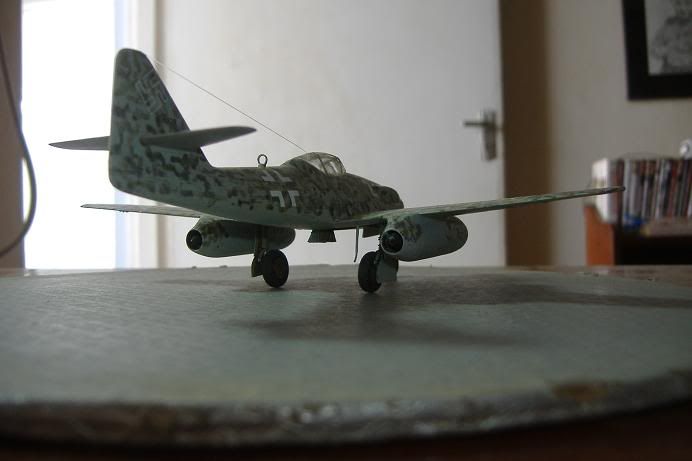
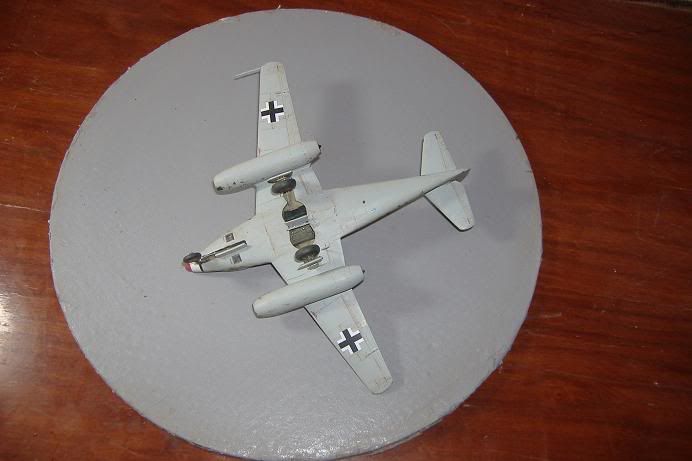
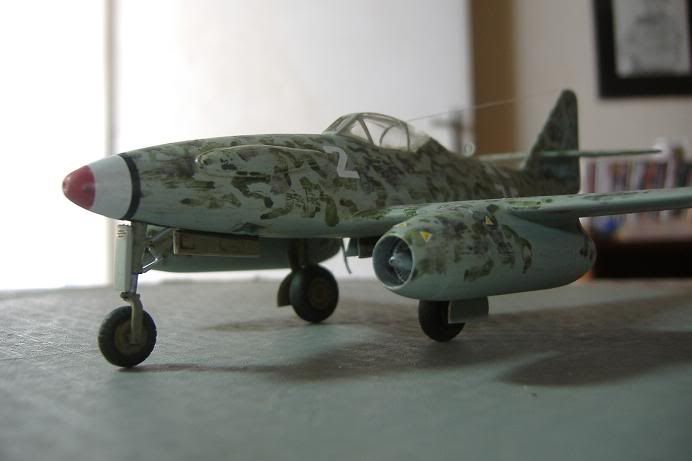
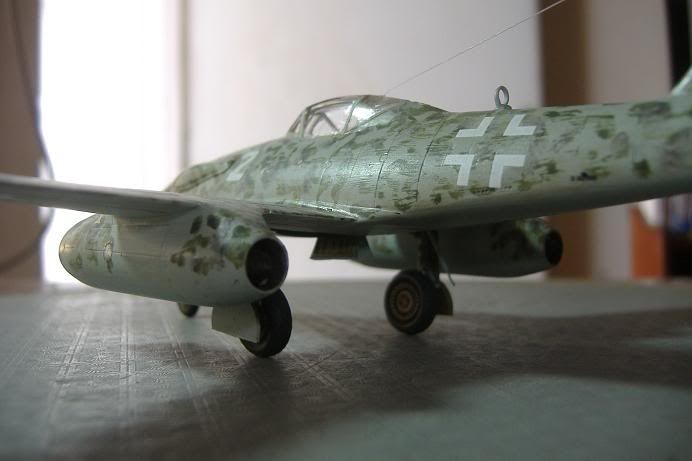
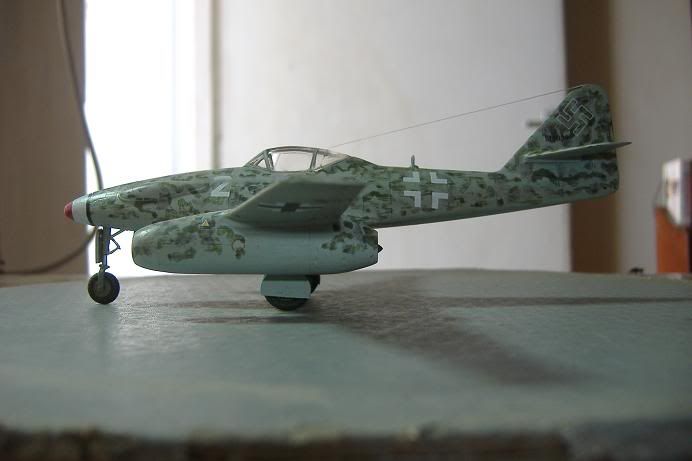
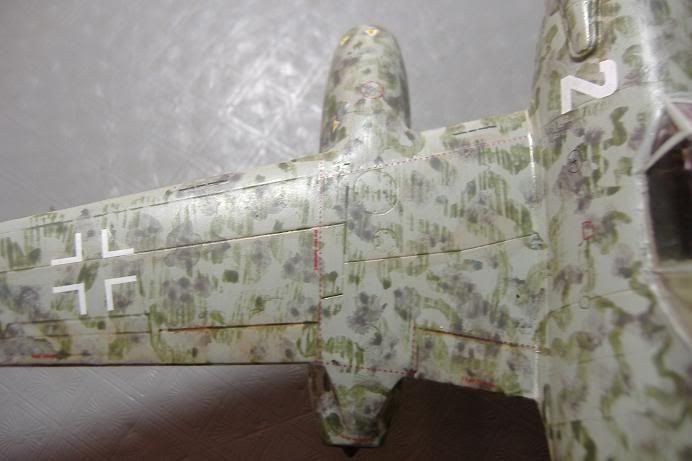
It is this latter problem that I have looked at with this model. Whilst many 262's were finished in solid colours, the more interesting ones were not, and had an assortment of lines and squiggles all over them that are possible to reproduce with an airbrush, but slightly more difficult to simulate with a paintbrush. So the challenge was to see if I could get a sense of pre-shading as well as some sort of approximation of a sprayed finish from a scale distance. The experiment was partially successful, but capable of considerable development and refinement.
The kit...a little gem. Excellent fit apart from, oddly, the transparencies that we next to useless, and in the case of the camera ports, they were useless. Very little filler used anywhere and OOB apart from a mod to the undercarriage bay that allows sight of the reasonably detailed interior of the area under the cockpit floor. The kit blanking plates for the gun ports were not used and the port apertures filled with Greenstuff quick-dry and sanded down.
This kit needs A LOT of weight in the nose. I used the last of my fishing weights for this...if anybody feels like donating a box of fishing weights to Cork Industries Inc they would be gratefully received.
Three options for transfers, good and very comprehensive range of detail markings, opaque, only problem was that they were tricky to remove from the backing sheet. Some silvering despite liberal Futuring. The Hakenkreuz were from an Arado 234 sheet that Bruno sent...and are, yes, oversize for this kit.
It cost me four quid three years ago, and is value-for-money. Finely recessed panel lines, good match across the fuselage seams, difficult to fault in this respect anywhere.
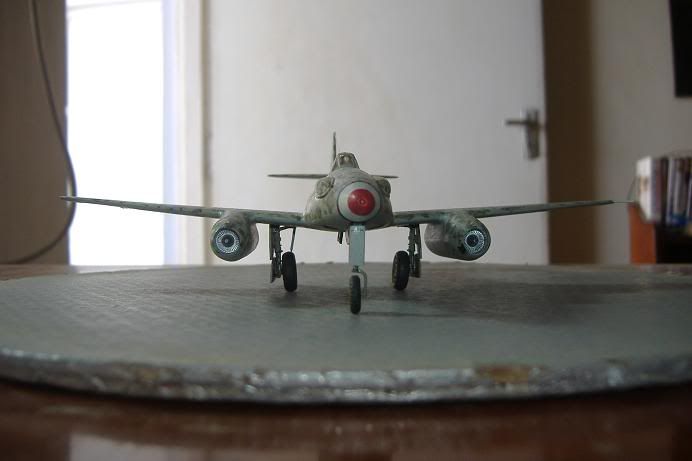
Accuracy...not a clue as to dimensions, but it looks right apart from the sit of the nosewheel which most certainly does not. Much too 'stand up straight' compared to pics of the real thing.
Overall, 8/10 for the kit.
Painting and finishing...
All principal colours were Lifecolor acrylics, everything else Humbrol. The preshading experiment was unsuccessful. I shaded the principal panel lines a dark green, and then painted 76 over them, then tried the Wonder Technique of gently sanding back the topcoat with 1000 paper. Well it sort of worked as you can see from the attached, but not really, and the finish eventually went under a couple more coats of 76 and even after very careful sanding with the 1000 you cannot really see anything of the preshade. I think you really do need the delicacy and consistency of the airbrush for preshade to work...unless any of you have other ideas.
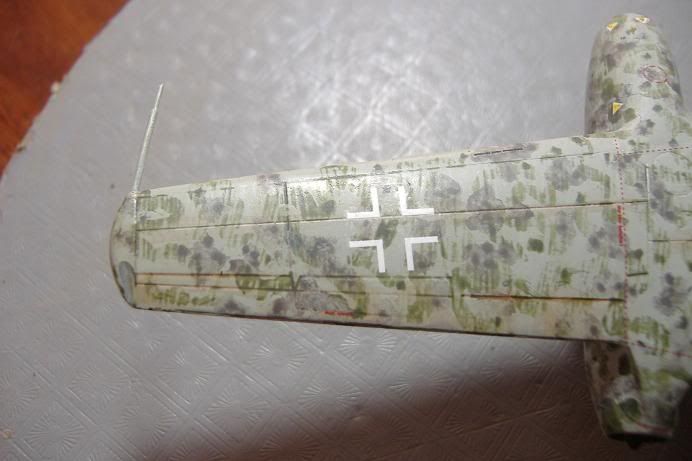
Now the squiggly bits... Again, this was very much an experiment. I knew I was not going to get a finish that looked like it had been airbrushed, and this is an interim phase I suppose in working towards a better solution. So the same technique was applied, I thinned to almost watery consistency the paint that was supposed to look like the airbrushed colours and then, 24hrs after painting, began to very gently sand them back.
The problem you can easily see...as soon as I started to sand back the very thin coats of squiggle, the striations caused by the inconsistency in the brush-strokes in the base colour beneath were immediately obvious. Which gives a rather picturesque effect but not quite a simulation of an airbrushed finish!! the two closeups of the port wing give you an idea of what it looks like from eyeball-range. From a distance, the effect is sort-of there, but not really close enough to pass muster.
Panel lines and weathering...all done with thinned sepia ink. No dints or dings exposing the metal beneath 'cos these things were kept clean apparently.
The topcoat was a mix of Future and Tamiya basecote. I have now experimented several times with the mix for this and for the first time have got it about right, with the required level of consistency of finish and the right sheen as well. So at least something went right.
And there you are gents...good in parts. No prize-winner but not an unmitigated disaster either. Photography courtesy of the camera Bruno sent me...for which I am forever grateful.
Next up...finishing the 190 V18....a true Dog-erina if ever there was one.
Tootle pip!
Chris