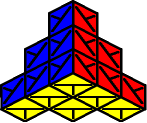
A Triamid has 4 corners and 6 edges. Even though each piece is identicle in shape, the corners have three different colors while the edges only have two. By now, all 4 corners are solved and lie at "corner territory" where they belong; forcing the remaining 6 edges at "edge territory", where they belong as well. At this point, the corners are solved, but the edges need to be placed.
Each edge has two sides exposed. Most of the time, some of the edges only show the same color (because the other color is buried inside). They are easy to spot, since they appear to have a "solid" color. Your next task is to reveal both colors of every edge.
 |
Rotate the entire Triamid so that the edge in question is at the bottom-back-left (see diagram). |
Do the Move:Lf- Rf- Lf- Rf+
|
 |
Rotate the entire Triamid so that the edges in question are at the bottom-back-left and the bottom-back-right (see diagram). |
Do the Move:Lf- Rf- Lf- Rf-
|
Sometimes there are two edges that are hiding their secret identity, but are not always next to each other. You can invert them one at a time, but to save a few moves you can pair them together and fix both of them at the same time. The main reason I've included this step is because the Triamid falls apart way too easy; so my theory is: "The less moves, the better!"
Setup: |
 |
Do the move:R- L+ R+ L- |
 |
Result: |
Afterwards, use the same move to Expose Both Colors of Two Edges (as explained earlier) .
To move edges around, use the same exact moves you would noramally do when solving a the Pyraminx. Don't worry, as the same moves are on this very page. Just like the Pyraminx, you must move all the front edges to the front side, but not necessarily at the correct spots. Once all of the front edges are indeed on the front side, then the next phase is to move them into their correct spots, just like the Pyraminx (again)!
Move from the |
Move from the |
Move from the |
 |
 |
 |
B+ L+ B- L- |
B- R- B+ R+ |
B+ R- B+ R+ B+ |
Exchange |
Exchange |
Swap Two Edges: |
 |
 |
 |
R- L+ R+ L- |
L+ R- L- R+ |
T- B- T- B+ |
Note: even though the front edges should now be in place, some may still be inverted. This may make the front side appear to be somewhat scrambled, so use the colors of the corner pieces as a guide, to make sure that the front edge pieces are at least in the correct spots.
Rotate the entire Triamid so the the old front face is now the new bottom face. Now you can view the other three edges pieces. There are three possilities; two are solvable while the last one is not. Some of the edge pieces may be inverted, so once again use the colors of the corner pieces as a guide.
Exchange |
Exchange |
Swap Two Edges: |
 |
 |
 |
B+ T- B- T- |
B- T+ B+ T+ |
Parity |
If you encounter a parity error, then you must go to the page Parity Fix before continuing on. Otherwise...
NEXT: Solve the Edges