Photos Section (click on thumbnail image to enlarge it)
| Dark Eldar Conversions - Ravager with Removable Armor 2 | ||||||||||||||||||||||||||||||||||||
| Dark Eldar Conversions | Next | |||||||||||||||||||||||||||||||||||
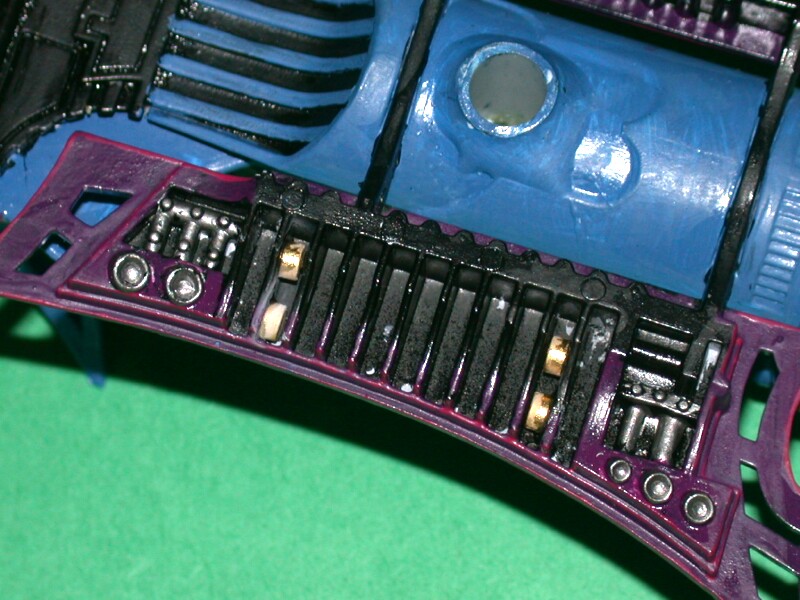
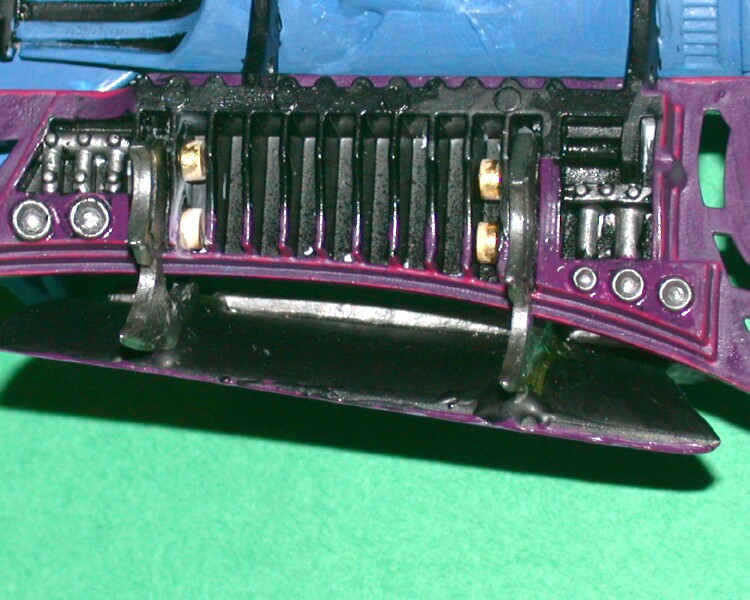
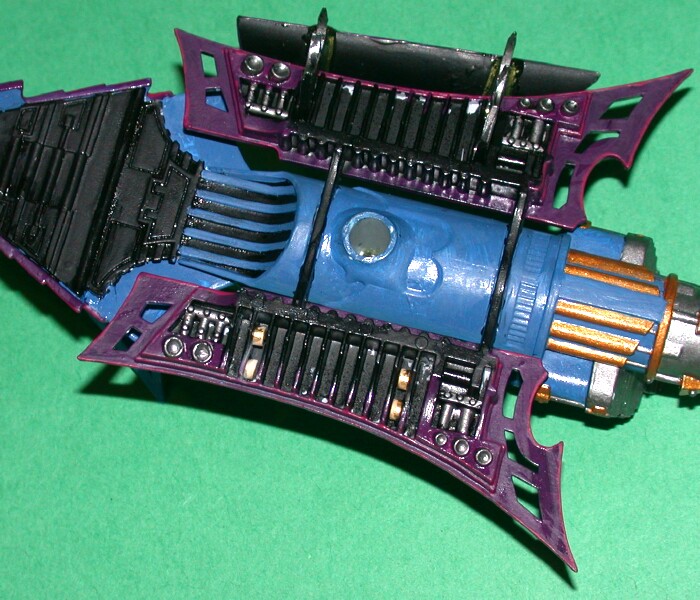
| This conversion is a refinement on one that I made two years ago. Originally, I used pins to secure the Ravager side armor plates to the vehicle body. ?The pins proved to be a viable solution, however they were not easy to insert and remove unless you had access to needle-nosed pliers. The new approach to making removable side armor utilizes small, powerful, rare-earth magnets that are glued into the side plate supports and into the vehicle body. The magnets that I used were 1/8" diameter by 1/16" thick. First, a set of two magnets was glued into each side support that holds an armor plate. The plates were then fitted to the raider and additional magnets were positioned in the Raider body to match the magnets in the side supports. The magnets in the Raider body were secured in place with cyanoacrylate "super" glue. Once the glue had set the armor plate were removed and the magnets were further bonded with epoxy. The side armor plates can now be easily added and removed by hand. Photos Section (click on thumbnail image to enlarge it) |
||||||||||||||||||||||||||||||||||||
| Miniatures � Games Workshop 2004. All rights reserved. Used without permission - models painted by Dan Moore | ||||||||||||||||||||||||||||||||||||
|
||||||||||||||||||||||||||||||||||||
|
||||||||||||||||||||||||||||||||||||
|
||||||||||||||||||||||||||||||||||||
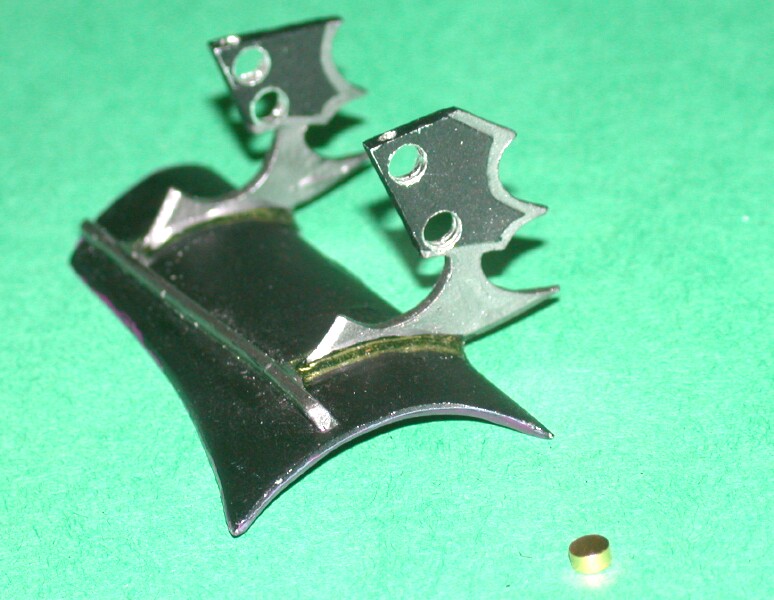
| A side armor plate and magnet (foreground) Note the 1/8" holes drilled in the side supports | ||||||||||||||||||||||||||||||||||||
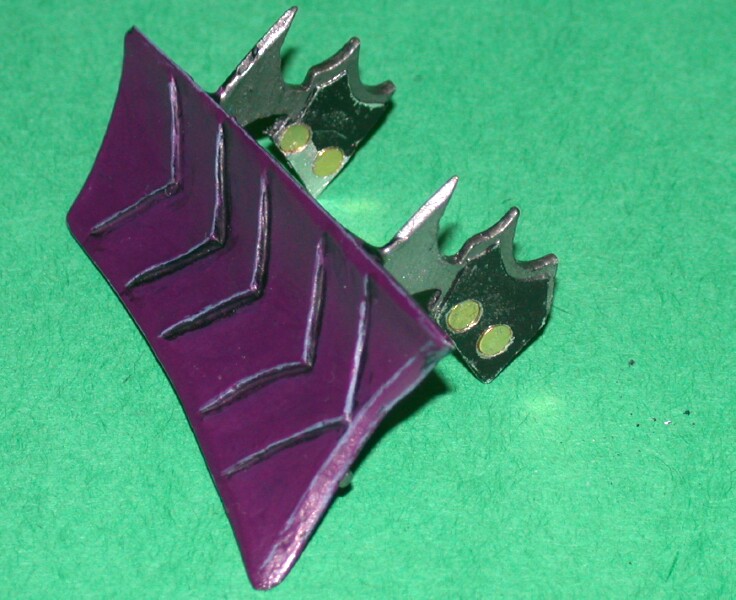
| Two magnets are glued into each side support. | ||||||||||||||||||||||||||||||||||||
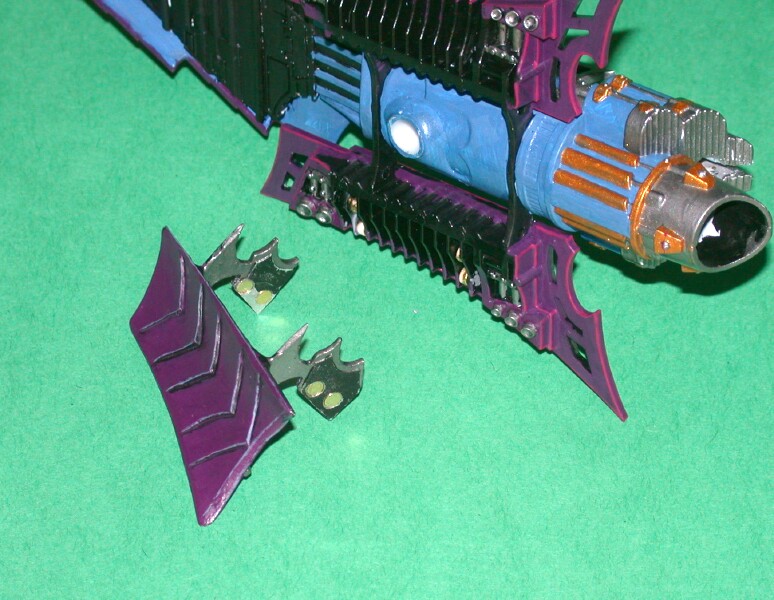
| The side armor is mounted to the vehicle and additional magnets are mounted in the vehicle | ||||||||||||||||||||||||||||||||||||
|
||||||||||||||||||||||||||||||||||||
|
||||||||||||||||||||||||||||||||||||
|
||||||||||||||||||||||||||||||||||||
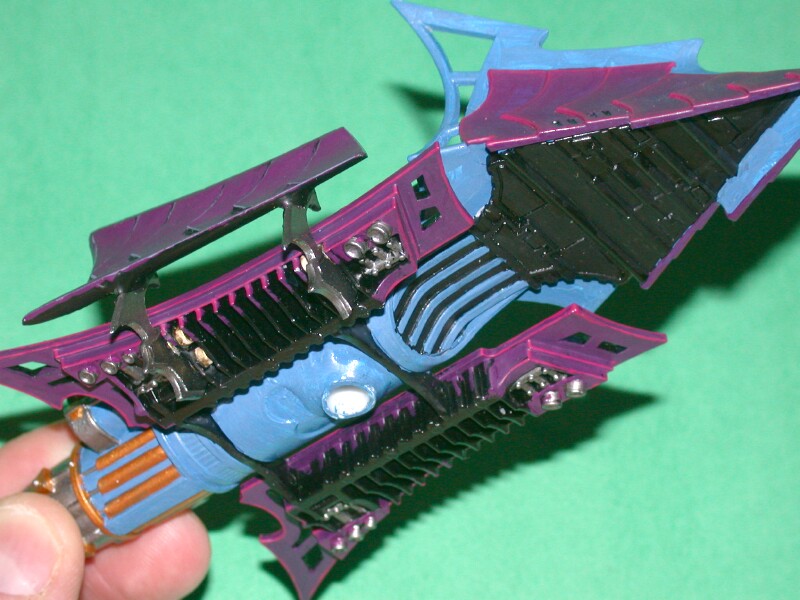
| A view of the Ravager with side armor plate | ||||||||||||||||||||||||||||||||||||
| A bottom view of the Ravager showing where the additional magnets are mounted | ||||||||||||||||||||||||||||||||||||
| A view showing the side armor plate mounted in the ravager body | ||||||||||||||||||||||||||||||||||||
|
||||||||||||||||||||||||||||||||||||
| A bottom view showing all magnets mounted. | ||||||||||||||||||||||||||||||||||||