 Transparencies
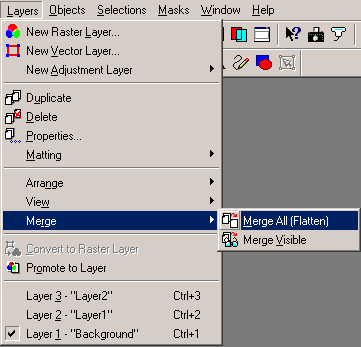
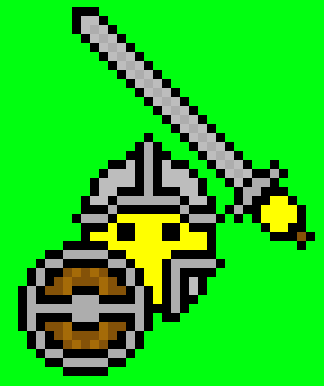
Step Four Okay, right now I'm just going to tell you how to make the smiley transparent, so it can be used as is right now. Its going to involve simply merging all the layers together, and setting up the transparency. If you plan on going on to Step Five, animation, then make sure you keep a copy of the layered smiley. Its going to involve some of what you see here, and some extra stuff, and is all around more confusing. For those of you who just want a usable smiley, this will be the last page you need to read. Alright, lets finish this (non-animated) smiley! If you made yours the way I did, you have a smiley who's pieces are scattered over 3 differant layers, and thats not good for showing your smiley to other people on message boards. What we want to do is merge, or squish, all the differant layers down into one single layer. In PSP, you do this with the Merge Layers command, and you want to Merge All (Flatten), in the Layers menu.
After everything is merged down into one layer, we need to color the background in a color we aren't using in the rest of the smiley. Reason for this is in just a few seconds, we'll be setting transparencies, and we will want to set it to that background color so it won't show up. I make a habit of using this really nasty shade of green for my transparency colors, as almost nothing ever uses it. So, I just flood fill the background of my now single layered smiley with nasty green color.
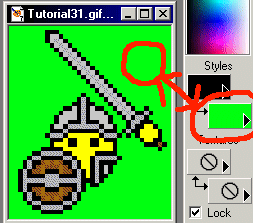
First step in setting a transparency the easy way in PSP 7 is to make sure you have selected the green color as your background color. Can't think of a good way to explain this, but I can show you easy enough.
You'll have to forgive the image quality, but 256 color gif doesn't cope well with a truecolor pallete in the picture.  But you can see what I ment,
that second box should be the same color as whatever you made your
background color. But you can see what I ment,
that second box should be the same color as whatever you made your
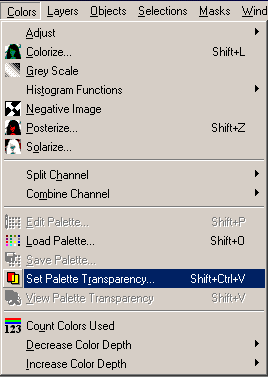
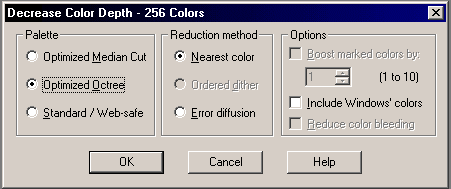
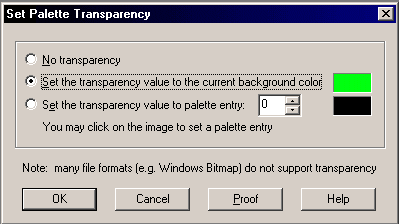
background color.Everything should now be set up to tell PSP to make your image transparent. Go into the Color menu, and select Set Pallete Transparency. You then want to Optimize the Octree to the Nearest Color (just select what I have selected in the illustration below), and then set transparency value to current background color (see illustration). Since we have out background color already set to that green, we don't have to go picking through the pallet to find it. A second or two to set the background color earlier on saved us time here. Once all that is done, click Okay, and the file is now transparent. Go into File, Save As, choose GIF from the menu, and save your smiley, cuz you is done!
Congratulations, you've now made a full smiley from start to finish! If this is all you wanted to do, I believe we are finished, and I'll just say goodbye and that I hope you found this tutorial interesting/useful/not completely boring. For those of you that want to know more, there are two options for you. Part Five will take you on to learn how to animate smilies using Animation Shop. Part Six is general help on how to get an account on Geocities (no illustrations, you can figure out how the internet works on your own, I trust), and the secret little trick on how to bypass Geocities anti-file leeching policy. So, either goodbye and thanks
for coming, or:
|
