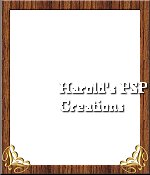
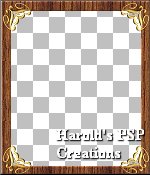
Teak Wood Frame
Tutorial .. Page 2.


33. Go to "Edit/paste/paste as new layer." The "Gold Corner" will appear on the "white center."

34. Go to "Image/rotate/ rotate left=45 degrees." While the "Corner" is still activated, [The "Marching Ants" still surrounding], move the "Corner" down to the bottom left hand corner of the "Teak Frame."


35. The "Corner 1 layer" heading will be highlighted. Right click on this heading and when the "Options box" pops up, left click on "Duplicate." You will not see anything happen as the "Copy of the Corner 1 layer" will overlap the "Corner 1 layer."

36. Go to "Image/mirror" and the "Copy" of the corner will appear on the bottom right hand corner of the frame.

Now to save your work again. Go to "File/save" and your work will be updated in the same name of "teak_frame1.psp."

37. You have 5 layers now. "Layer 1"; "color layer"; "Border Layer"; "Corner 1 layer" and "Copy of Corner 1 layer." Turn off the 3 bottom layers ["layer 1"; "color layer" and "Border layer"] by clicking on the small glasses to the right of the "layer headings." Red crosses will appear on the "small glasses."

38. Go to "layers/merge/merge visible." You will see that now you have 4 layers. The 3 bottom layers and the layer named "merged."

39. The "merged layer" heading will be highlighted in a blue color. Right click on the "merged layer" heading and in the "Options box" that pops up, left click on "Properties" and rename the highlighted heading "Corners."


40. While the "Corners layer" is still highlighted, right click on the heading and when the "Options box" pops up, left click on "Duplicate." You will not see anything happen.

41. Go to "Image/flip" and the "Corners" will appear on the Top of the "Teak frame."

42. The 3 bottom layers are still "turned off." Go to "Layers/merge/merge visible." Right click on the "Merged layer" heading and left click on "Properties" and rename the merged layer "Corners."

43. Turn the "Border layer" on again, leaving the 2 bottom layers turned off. Go to "Layers/merge/merge visible."

44. Right click on the "Merged layer" heading and when the "Options box" pops up, click on "Properties and rename the merged layer "Frame."

45. Turn the 2 bottom layers on again by clicking on the "small glasses" and the red crosses will disappear. We now have 3 layers. "Layer 1"; "Color layer" and "Frame layer."

Now to save your work again. Go to "File/save" and your work will be updated in the same name of "teak_frame1.psp."

46. Now is the time to remove the white "Color layer." Activate the "Color layer" by left clicking on the heading.

47. Left click on the "small rubbish bin" to the top left of the "layers pallet." When the "Options box" asks if you want to remove this layer, click Ok.

48. Go to "Layers/merge/merge visible." Rename the merged layer, "Teak Frame."

49. Now to save your "Teak Frame." Go to "File/save as" and save your work in a ".pfr" extension as "teak_frame1.pfr."

50. If you are not sure how to save your new frame to add to your PSP Frames collection, go to the tutorial on my Web site "Saving PSP Frames tutorial."


Congratulations! You have finished this tutorial. I do hope you enjoyed completing your frame.


To Page 1: To Tutorial Index:


This tutorial is written by Harold E. Jones.

Other than for personal use, No part of this tutorial maybe copied or reproduced on any other Web site without permission from me, the author.
Harold E. Jones - Copyright � 2001-2002.

For further information, please E-mail me.


Hosted by www.Geocities.ws

1