Acrocanthosaurus
Kaiju Links Dinosaur Links
Modeling Links Cool Sites
Ratings Articles ????Which Kit????
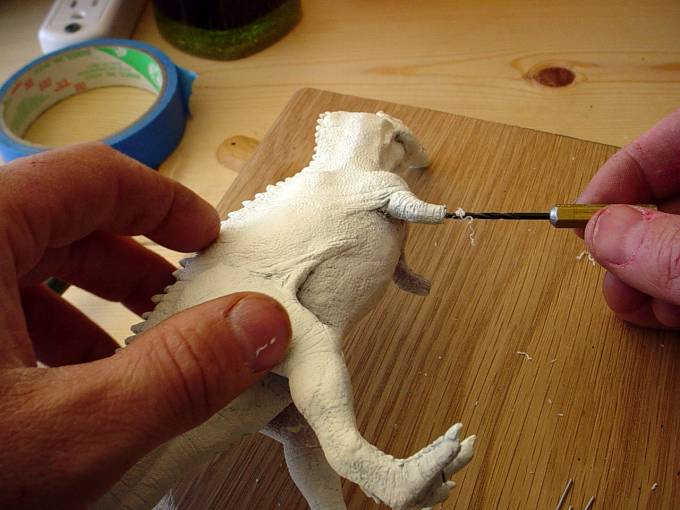
After the hands are removed, they have to be resculpted of course--which means creating an underlying wire structure (an armature) to hold the putty. I simply drilled out the forearm with a quick change bit by hand (see right).
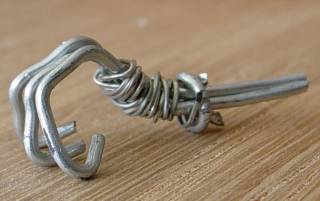
Initially, I put wire in both holes, but it really only worked out for the left hand. For the right hand, I wanted a grasping to hold a one or hunk of flesh from a carcass (I know . . . not a likely use, but drama is important too.) That required building a separate armature and then inserting it. The most demanding part was bending the future fingers into a shape that would suggest joints. Smaller gauge wire forms the palm and holds a middle finger in place, leaving a dual pronged insert. (See photos to the right).
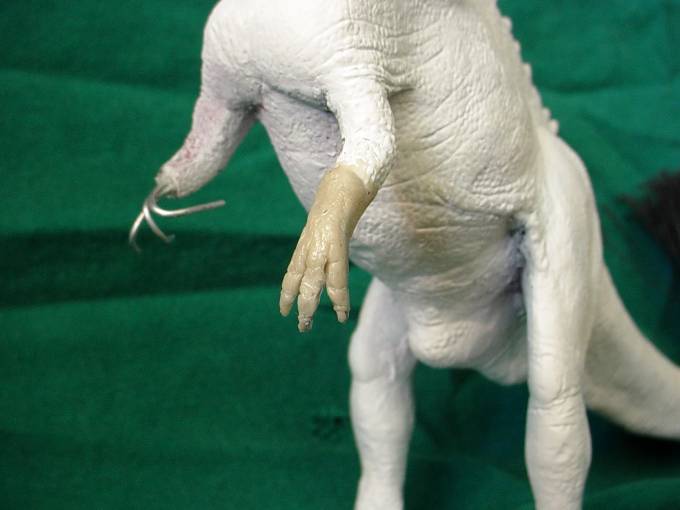
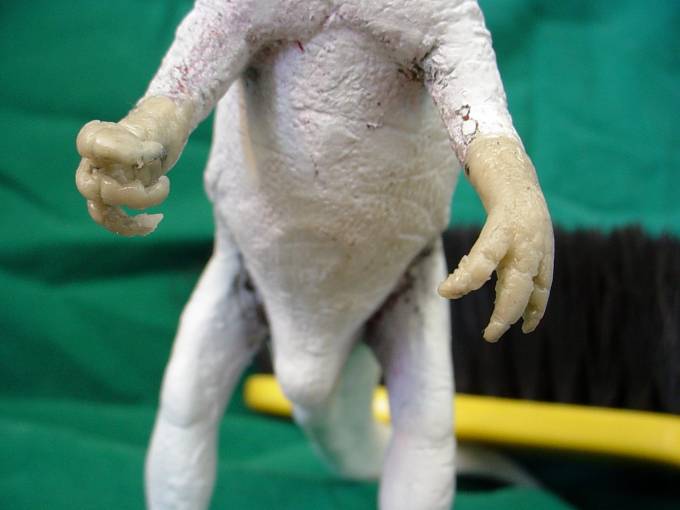
As the photos indicate, the right hand was done first, the second armature was created and then the second hand was done. The material I use for this and pretty much all my seam and reconstruction work is a great little product called Wonderputty by Mike Evan's Alchemy Works. It is a two part putty that mixes into a very shapable medium that dries rock hard. It is actually very cost effective because it takes very little of each part to make plenty to work with. In the final two photos, you can see the Wonderputty and how well it works.
A second Alchemy Works product is used to create the textures of the flesh--Repliscale. This is another two part product. Essentially, you mix equal amounts of the A and B parts to get a sticky gel. You apply the substance directly to the flesh texture you want to copy. Essentially, a latex impression is created and when it dries (within a few minutes), you can peel it off. This becomes a negative image of the flesh detail and you can apply it to the Wonderputty by pressing it firmly against the area before it hardens. The photos don't do it justice here, but it really does work. It is not only useful for sculpting, of course, but for hiding seams. Check the links page for more info on these products.
As for the final shape of the hands, it is not really as difficult as you might think. It would certainly help to be a sculptor, but with simple tools in a clearly defined project like this, an average modeler can do quite a lot. The best method is to work from the extremities back toward the body so the claws should come first, then the joints of the fingers, then the wrist textures. Using a hobby knife, a couple of toothpicks and a popsickle stick, I gradually gave shape to the fingers and ended up removing a good deal of the putty in the process.
Next stop--a bone to pick.