~Lesson 8~ |
 Next Page | |
| ||
~Lesson 8~ |
Next Page | |
| ||
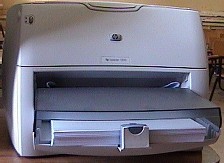
Adding a printer to a computer is relatively easy. First, follow the printer's instruction manual to attach the printer to the back of the computer's hard drive and to the power supply (wall outlet or extension cord). Also use the instruction manual to learn how to load paper into the printer, fix paper jams, and clean the printer.
After a printer has been attached to a computer for the first time, the computer needs to be given information about the printer.
Opening the Printers Folder in Windows 95, Windows 98, Windows 2000 and Windows Millennium Edition (ME)
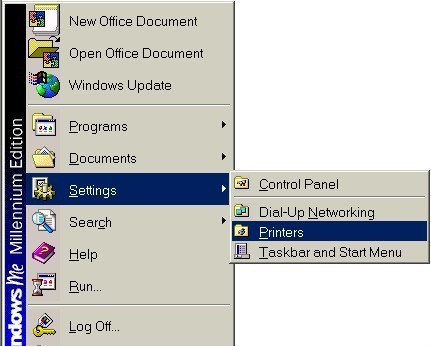
There is a folder on the computer specifically for printer information. It is called the Printers folder and it is located in the Control Panel. There are two ways to open the Printers folder. The first way is to open the Start Menu and select Printers.
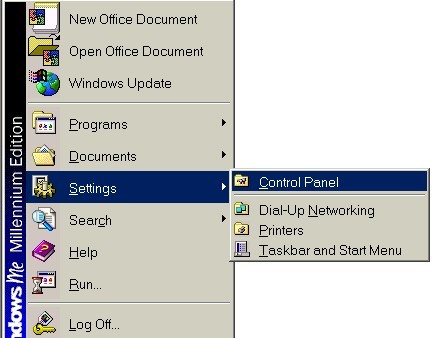
Another way to open the Printers folder is to open the Control Panel first:
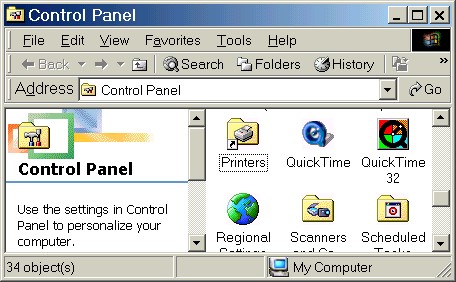
After the Control Panel is open, double-click on the Printers shortcut to open it.
Opening the Printers Folder in Windows XP
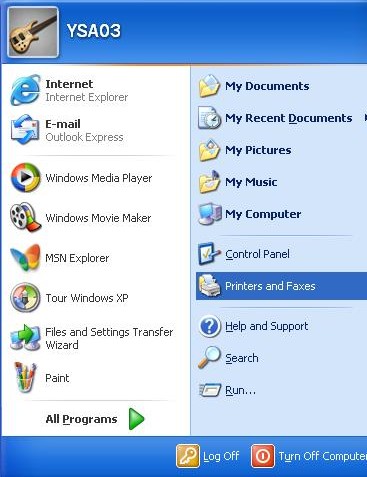
In Windows XP there are also two ways to open the Printers folder. In the first method, open the Start Menu and select Printers and Faxes.
When the Printers and Other Hardware window opens, left-click once on Add a Printer (Under "Pick a Task...").
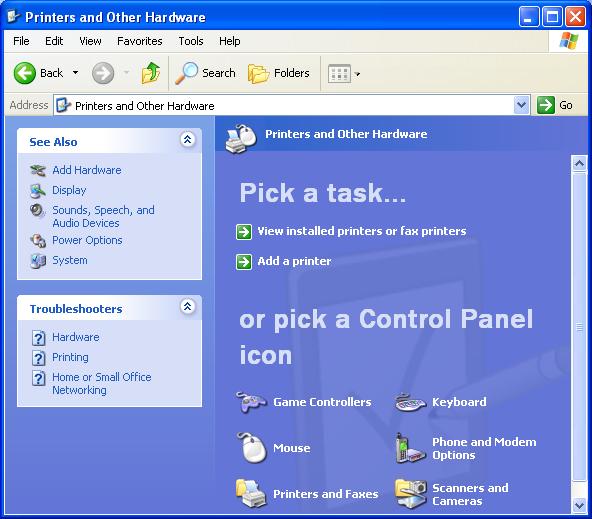
In the second method, open the Start Menu and select Control Panel. Next, left-click once on Printers and Other Hardware.

Once the Printers folder is open, it will look similar to this:
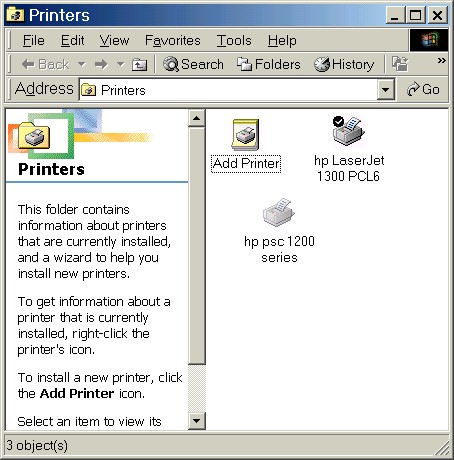
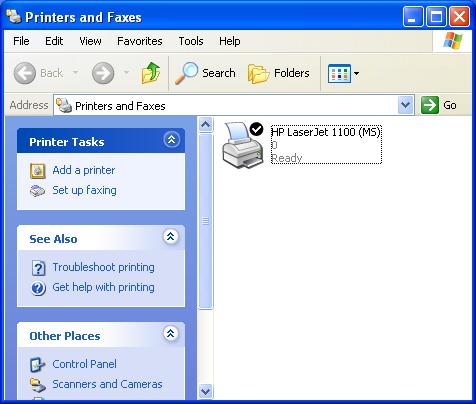
In the first picture above, the printer icon for "hp LaserJet 1300 PCL6" has a checkmark on the upper left-hand side of that icon. In the second picture, the icon for "HP LaserJet 1100 (MS)" has one also. The checkmark identifies which printer is the default printer. The default printer is where all work is printed unless you tell the computer otherwise. We will learn how to change the default printer later.
Add Printer Wizard
There is a wizard available to help in adding new printers. In Windows 95, 98, 2000 or ME, double-click on the Add Printer icon to open the wizard. In Windows XP, left-click once on Add a Printer (under "Printer Tasks"). The wizard will take you step-by-step through the process of adding a new printer, asking you to select options and input information about the printer.
The wizard used on your computer may be different from the one in the pictures below. The wizard in this example is for Windows Millennium Edition.
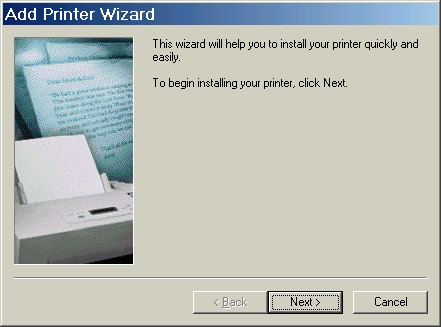
In this example, the first page of the Add Printer Wizard is an overview. Click the Next button to start.

Step 1: If you have only one computer, your printer is a Local printer. A Network printer is a printer shared by two or more computers that are connected together. Click the appropriate button and then click Next to go to the next step.
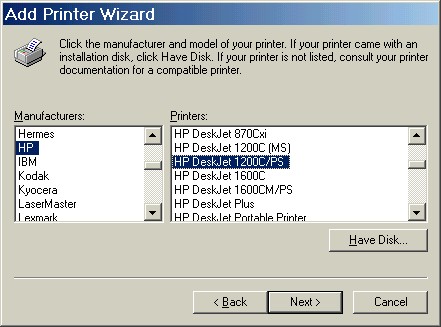
Step 2: Click on the printer manufacturer's name and the name of the printer. Most printers have their names somewhere on the printer itself; otherwise, look at your instruction manual. Your computer will probably have the information it needs for your printer, but if your printer is not on the list and you have a disk with the information the computer needs, click Have Disk and follow the instructions. Click Next to continue.
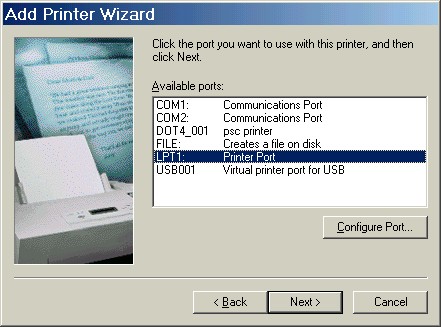
Step 3: The port is where you connect the printer to the back of the computer's hard drive. In most cases, you will be connecting your printer to the LPT1 port. Click the port name and then click Next.
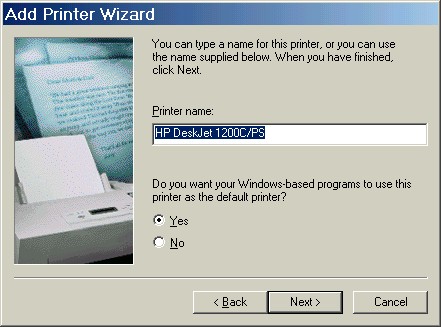
Step 4: If you want to change the name of the printer, type the new name in the box. If you are going to use this printer for all of your printing and want to make it the default printer, select Yes. Click Next to continue.
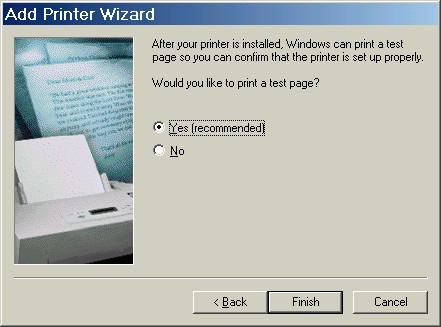
Step 5: It is a good idea to test the printer after adding all of the information, to make sure that it is properly connected to the computer. Select Yes to have the computer test the printer by printing one page of information. Click Finish to finish adding the printer. If you printed a test page, look at the page to see if the printer is working properly.
Practice:
| 1. | In Windows 95, 98, 2000 or ME, open the Start Menu, go to the Settings submenu and select Printers. In Windows XP, open the Start Menu and select Printers and Faxes. |
| 2. | In Windows 95, 98, 2000 or ME, double-click on the Add Printer icon to start the wizard. In Windows XP, left-click once on Add Printer under "Printer Tasks." (Note: If Add Printer doesn't appear under Printer Tasks, left-click once on the downward-pointing arrows next to the words "Printer Tasks.") |
| 3. | When the wizard opens, read the information and click the Next button. Read the next pages until the Next button becomes the Finish button, but be careful - DO NOT CLICK THE FINISH BUTTON. Instead, click the Cancel button. |
| 4. | Close the Printers folder by clicking on the Close ("X") button in the upper right-hand corner. |
Next Page |