January 21st-31st, 2000
Click on thumbnail for larger version
Friday 21st January, 2000
After a couple of days staring at the pile of ply standing against the wall in the garage, I decided it was time to actually use some of it. Nothing like expensive wood to make you think twice about cutting into it with power tools!
This first part went rather easily. Having cut a 10 inch wide strip of ply (48" long), I tacked it to the disks with some silicon bronze nails. Not too many, as the disks have to be kicked out later. The second piece was offered into place and it met up perfectly! I was astounded. SO astounded I stopped there and called it a night.
Saturday 22nd January, 2000
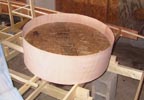
Still snowing (What do I expect - its Michigan!) so I warmed up the garage and set about starting to apply some of the skin to the craft. I cut the two side pieces and gave them a coat of epoxy with the roller. This was for the inside face. The epoxy soaks into the ply, making it waterproof and also makes it a deeper color, making it all look rather neat. You can see this effect in the background of the lift duct photo above. Ordered plans for fan and propeller today ($15 from Universal Hovercraft ) as I think I'm going to make them myself rather than paying approx $150 for precut ones.
Sunday 23rd January, 2000
Although the epoxy still hadnt cured completely I got bored with waiting and slapped on another coat of epoxy with wood flour filler and nailed the side pieces on! HEY! First panels in place!
Saturday 29th January, 2000
Following a week when temperatures were barely above zero farenheit, a slight warming allowed us to put on some more skin to the craft. We cut the rest of the sides and epoxied and nailed them in place.
Sunday 30th January, 2000
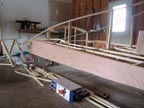
Today we removed the craft from the jig. Suprisingly, it kept its shape really well. We then cut up the jig into a new stand, enabling us to support the craft when we turned it over. Now we should be able to skin the undersides much easier. At this point I also removed the main stringers underneath, both to replace to glue with the far better epoxy resin, and also to allow the bottom skin to be placed BETWEEN the stringers and the ribs. This is just as in the plans, which I failed to notice before, and certainly will make it much stronger and more watertight. Still no sign of the prop plans.


