Effects
Menu
By
now you should have an idea of the size of
PSP and all of the things that are
available to you. If you aren't sure
of anything in PSP and you haven't
already, take a look at this
tutorial for an overview of everything
that is available in the programme.
This
tutorial is going to look in more detail
at the "Effects" menu... it's
definitely one of my favourite places in
PSP! :o)

You
will need:
A
copy of PaintShop Pro - you can download
a 30 day trial version from here
A
copy of Winzip - you can download it
from here
This
zip
file (the tube should be compatible with PSP versions 5,
6 and 7). Unzip it to somewhere on
your hard drive
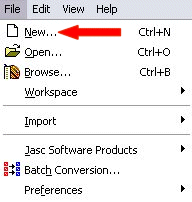
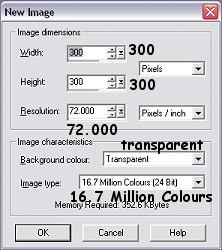
Fire
up PSP and start a new image (File, New) -
I've made my new image 300x300... I find
it's a good size to use if I'm not sure
how big my final image is going to be.
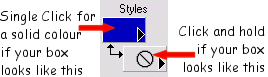
Use
your FloodFill tool
 and choose the colour, gradient or pattern
of your choice
and choose the colour, gradient or pattern
of your choice
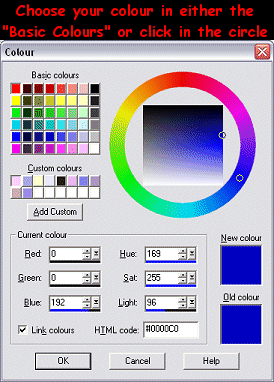
Click
the "OK" button, then hover over
your image so that the cursor turns into a
paintpot. Click on your image and it
will be filled with your colour, gradient
or pattern.
Open
up the PSP tube you saved at the start of
this tutorial (File, Open then navigate to
where you saved it)
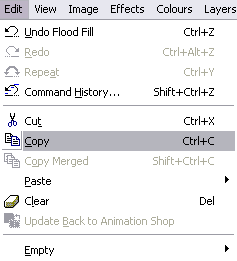
Take
a copy of the tube (Edit, Copy)
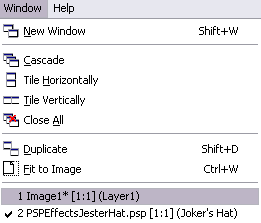
Go
back to your image (Window, click on the
name of your image)
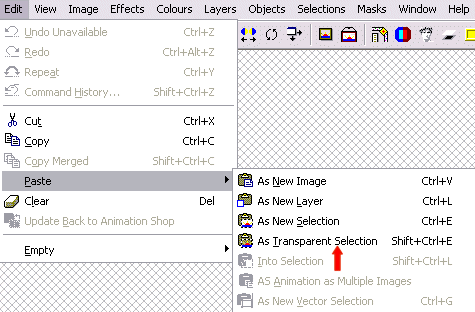
Paste
your Jesters Hat onto your image as a
transparent selection (Edit, Paste, As
Transparent Selection)
Your
Jesters Hat will now be at the end of your
cursor. Move it so that it is in
about the middle of your image (you don't
need to worry about being exact) and click
your left mouse button to paste it.
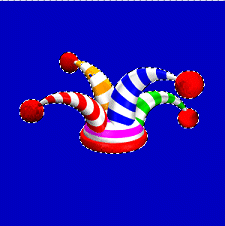
You'll
notice that your hat has some
"marching ants" (black and white
dotty lines) around the outside of it -
that means that it is currently
selected. We need to get rid of
those, so we need to deselect the
hat. Go to the
"Selections" menu and then
choose "Select None" from the
drop down list.
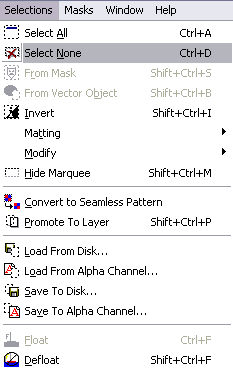
You
will notice that there is a keyboard
shortcut next to most of the options in
the various menu's. You don't need
to worry about most of them, but this
keyboard shortcut is definitely worth
remembering if you can. To deselect
something using the keyboard shortcuts,
hold down the Control key and press D.
The
marching ants will now have disappeared
from your image. This is where the
fun starts! :o)