GR-8
Shuttles
Operating
the shuttle. Also found at
www.geocities.com/gr8shuttles
As
with anything new, it takes a little practice.
This is how they work for us.
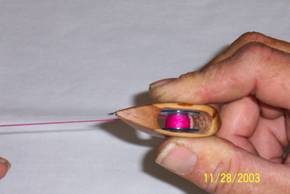
Note:
There is a top
and bottom to the shuttle. The slot screw goes in the big hole on the bottom
and the decorative screw in the smaller hole on top. The thread must come out of the shuttle on
the rear right side when looking at top of shuttle.
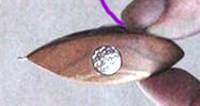
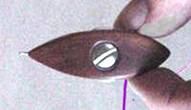
Top
Bottom
Do
not overfill bobbins.
The thread will fall off the bobbin, become entangled between the bobbin and
shuttle and will interfere with the screw action.
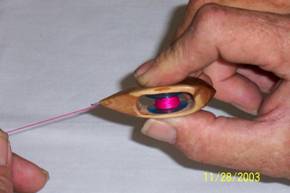
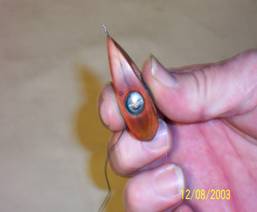
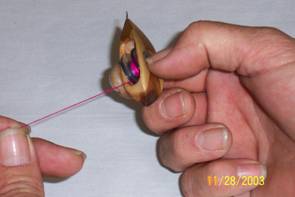
1. While
tatting hold shuttle between index
2. Turn the shuttle point up. Bottom facing
finger
(top) and thumb (bottom). Thread
towards you. Keep the thread to the
left hand
coming out shuttle into palm. When you taut. Keeping the thread taut helps control
need
thread, follow the procedure. the shuttle.
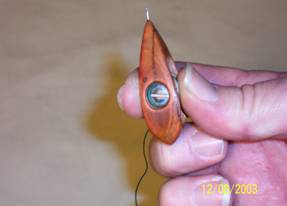
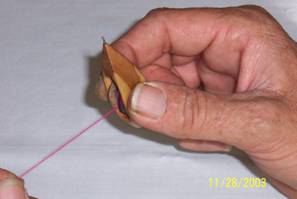
3. Place the thumbnail in the slot of the screw 4. Place the middle finger at the tail of
while holding the top flat screw with index finger. shuttle.
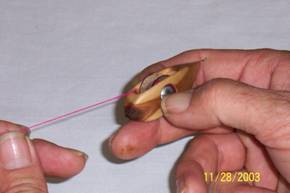
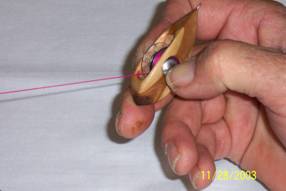
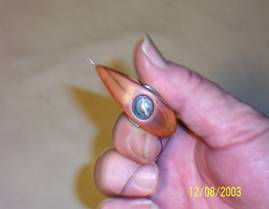
5. Push out the tail of the shuttle. This turns 6. Reach out with the middle finger onto
the slot screw and loosen the tension. Pull the tail of the shuttle.
thread to desired length.
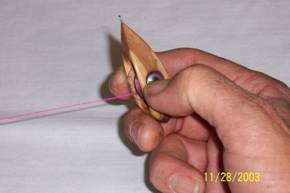
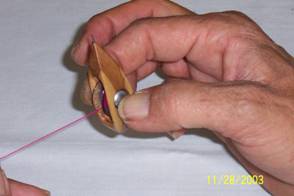
7. Still holding the screws, pull the tail of the 8. Reposition the shuttle into the tatting position.
shuttle back towards the palm, tightening the Resume tatting.
screw.
By
pulling the thread and simultaneously tightening the bobbins with your fingers
will help adjust the tension of the bobbins against the screw. When perfected, there's a fine margin for
tension adjustment on the screw. Generally, between 1/4" - 1/16" turn
of the screw, but can be as slight as 1/32" on some shuttles.
In essence, hold the screw in place and turn the shuttle around the screw. By keeping the thread to the left hand taut, it helps stabilize the shuttle and manipulate thread tensioning.
To
remove bobbins,
hold shuttle bottom side up in left hand between thumb and middle finger, with
index finger on top screw. Turn slot screw counterclockwise until free. Remove screws and bobbin from shuttle.
Looking at the slot screw (bottom); right – tight, left loosen.
Reassemble
by inserting bobbin (make sure thread comes out correct side). The thread must come out of the
shuttle on the rear right side (when looking down at the top of shuttle)
in order to turn the screw in the correct direction when thread is being pulled
from it. Insert top screw, turn shuttle over and hold same as removal, in left
hand with index finger on decorative top screw. Insert bottom screw and gently
turn counterclockwise until screw clicks, setting screw threads. Turn screw
clockwise until snug. Do not stress fingernail. Snug with the fingernail should
be just about right for the correct tension of the bobbin. Position shuttle in right hand for tatting.
Pull thread to check/adjust tension. Adjust tension as described in above
shuttle operation if needed.
Using
a small screwdriver should speed up the process of changing bobbins.