| Do It Yourself . . . |
| Do It Yourself . . . |
| Custom Fiberglass Enclosure |
| Custom Fiberglass Enclosure |

|
 |
|
|
| Fiberglass Enclosure 1 |
| Fiberglass Enclosure 1 |
| Please Read First: Any practices carried out by using the information provided within these webpages should be done with extreme care. Fiberglass resin fumes are harmful, MDF particle dust is harmful, and working with power tools can be dangerous. Always use extreme caution and the proper safety equipment. (i.e. respirator, safety goggles, etc...) It is recommended that fiberglass and resin is used outside or in a well veltilated area, and all other manufacturer's recommendations are followed. |
| First things first . . . Be aware that this stuff is MESSY! Protect yourself by wearing long sleeves and gloves. Getting resin stuck in your arm hair is not fun. Protect your vehicle with old sheets or other drop-cloths. When working out of the car, protect the work area. A little preparation will make clean-up so much easier. |
| In this project a more practical fiberglass enclosure is built. This enclosure is for 2 subwoofers with the goal to conform closely to the side of the trunk to save space. |
 |
| This is the area of the trunk that was chosen to work with. The original box is a huge bandpass box that takes up nearly the entire trunk. The goal here is better sounding bass using a sealed enclosure, and a useable trunk. Before we can do any work, clear the area as best as possible. Remove all debris and vacuum as necessary. Smooth out the carpeting as much as possible. |
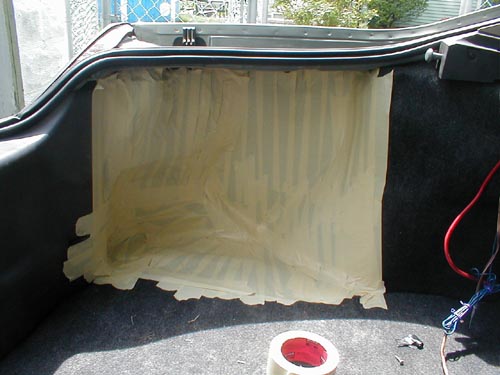 |
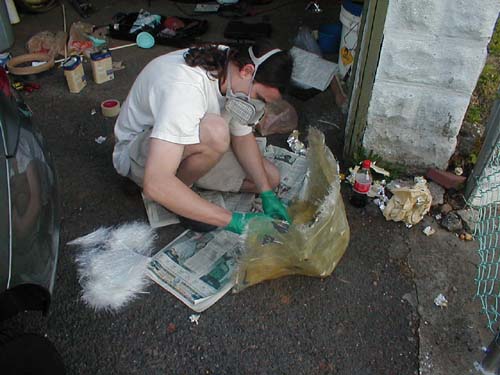
| Tape off the entire area with masking tape. Try to estimate how large the box will be and go about 3"-5" beyond that. This will be excess glass that you will cut off later. The tape is laid right over the carpet. Cheap masking tape is used in the picture, which works fine, but if you use the blue painter's tape it seems to stick as well, but it releases much easier. For extra safety we will tape a layer of aluminum foil to the masking tape. The purpose of this is to make sure resin will not get on the carpet of the vehicle. |
 |
| This is a shot of the trunk after the aluminum foil is put in place. You'll notice quite a large section taped off. The box is not intended to be this large, but it will help cover in case of any accidents. Resin will not come out of carpet very easily. Remember, before you start to use the resin. You will be working in the cinfined area of the trunk. It is important that you use an actual respirator, not just a particle mask. With this on you should not smell any vapors. |
 |
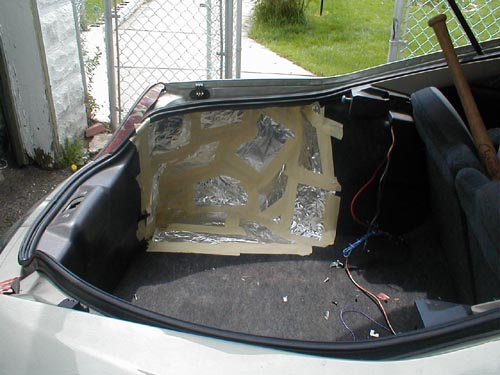
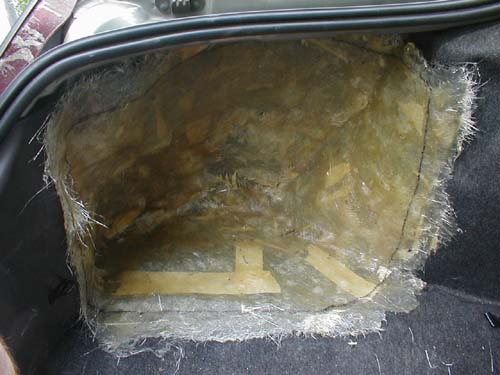
| This is after 1 layer of glass has been applied. The procedure for applying glass is the same as described in the Basic Fiberglass tutorial; resin surface, lay mat, stab mat, remove air bubbles, and repeat. Also remember when mixing up the resin and hardener; do not mix too much at once. This process will take some time and the resin will 'gel' up if it sits too long. After about 2 hours, the glass should be dry to the touch and you can remove it from the car. |
| The form will flex some when you are taking it out of the trunk, which is ok as long as it retains its shape. Work your hands around the carpet and pull the entire thing out. Remove as much of the tape and foil as possible. The rest of the work can be done outside the vehicle. |
 |
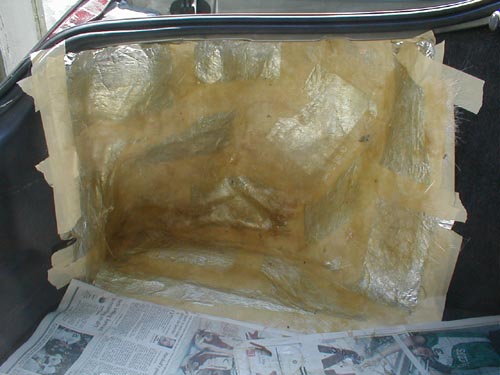
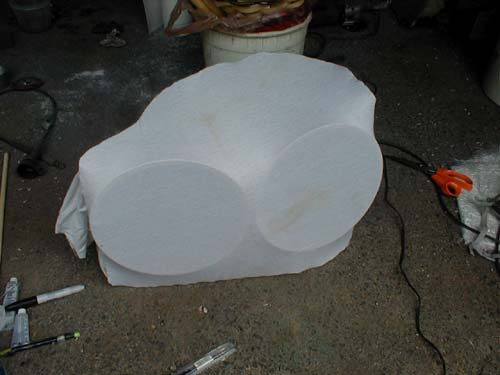
| This is how the fiberglass will look with the tape and foil removed. At this point, tt is very thin and almost transparent. |
 |
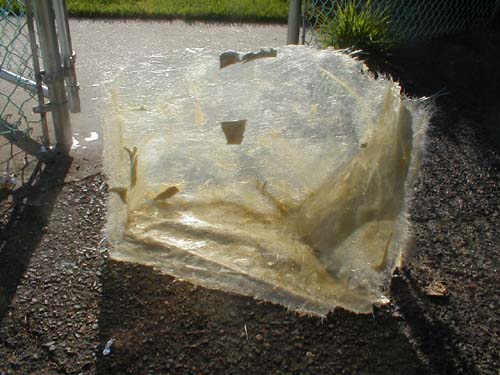
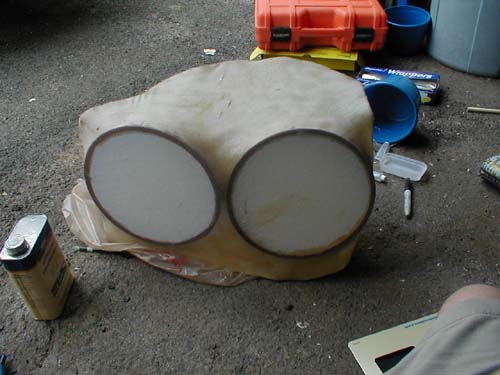
| You can now add additional layers of fiberglass. Remember, no more than 2-3 layers in one sitting, and don't apply again until it is dry to the touch. (If it's a little tacky it will be OK) |
 |
| After your layers have dried, test fit the enclosure. Use a marker and outline the edge of where you want the box to end. Next use a Dremel tool (or anything else that will cut the fiberglass) to cut off the edges where you marked. You will need to wear safety goggles and a particle mask, along with a long sleeve shirt to complete this step. |
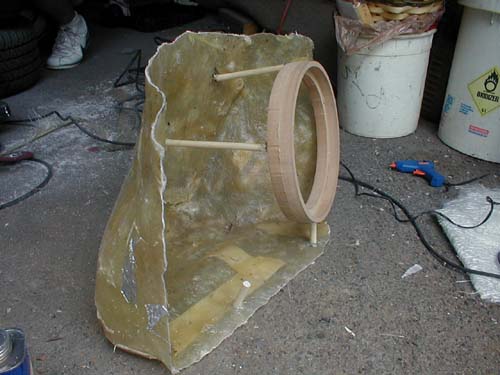 |
| Next, we will need to mount the MDF rings. The wooden rods used here are 1/4" wooden dowels. Cut the rods to support the rings in the position of choice. Use hot glue to secure the rings and dowels. Once it is dry make sure it is strong enough to not get pulled out of shape when the fabric dries. |
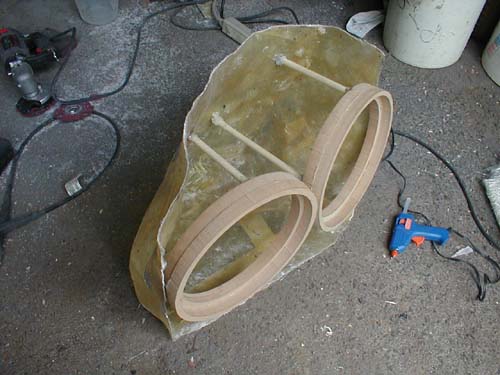 |
| The second ring is then mounted. Again make sure both rings are positioned correctly and will not move or fall apart. |
 |
| Wrap the enclosure, keeping the front wrinkle free. You can use hot glue or a staple gun to attach the fabric to the back of the enclosure. After pulling the cloth around and attaching it, cut away all the excess. This will make it easier to finish later on. |
 |
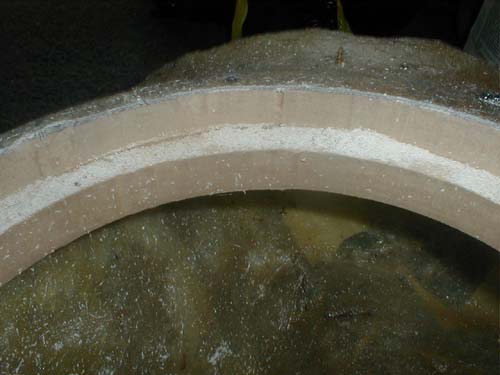
| Dip your brush in the resin and paint it over the fabric. Cover the entire enclosure, except for where the speakers will go. The dark rings you see in the picture is the MDF showing through. Make sure you resin the rings throughly, you do not want them coming loose later on. If you want to use the same brush between coats, you can soak it in acetone while the glass is drying. This will keep the brush from hardening. Once the fabric has dried, you can begin applying fiberglass to it. Keep adding layers until it is strong enough. 7-9 layers is usually good for subwoofers. |
 |
| Here is the enclosure all glassed up. You can see the resin can in the picture. This size project will require the gallon size instead of the quart. It will be cheaper in the long run. The quart size of resin should cost somewhere around $10. You can find a gallon of resin for about $16, but you might have to look in a marine supply shop. |
 |
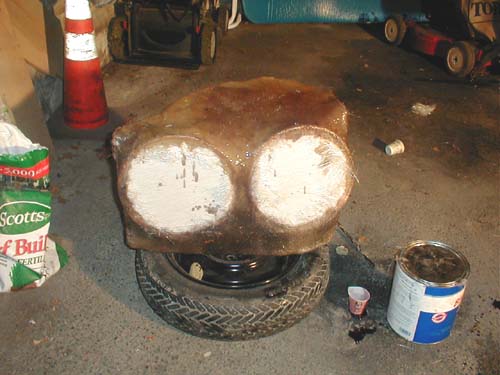
| Once the entire structure is dry, cut away all excess glass. Trim out as close to the wood as you can. A flat router bit works great for this step. A Dremel cut-out tool will also work well. You can now test fit your speakers with this enclosure. |
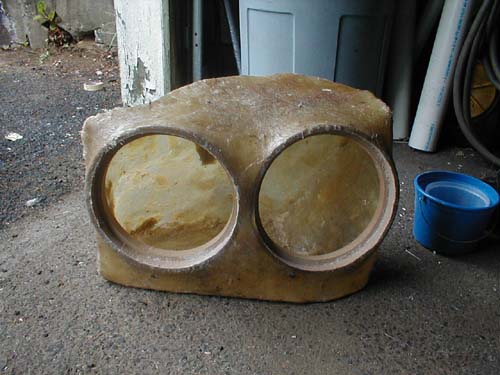 |
| This is how the enclosure will look once it's all cut out. You can now start the finish work with body filler and sanding. Remember carpet is the easiest, but does not look as nice as vinyl or paint. Vinyl and paint require much more finish work. It's up to you though. |
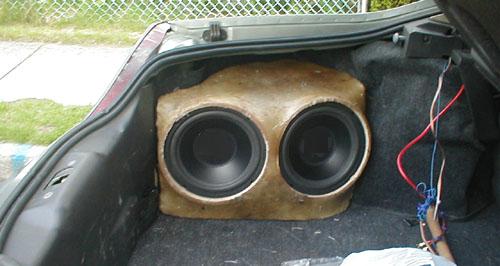 |
| Here we can see what the enclosure will look like once it's installed. If you use terminal cups to wire the speakers, you will need to make sure it's properly sealed after the cup is installed. Also remember that if you use any silicone inside your box, make sure it is completely dry before you install the subs. Fumes from wet silicone will eat your speaker surrounds. |
| Most sealed boxes use seperate chambers for each sub in an enclosure. This enclosure was constructed with one chamber. You can make a seperator using wood and/or fiberglass. |