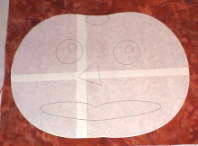
Iron the shiny side of the freezer paper to your pumpkin fabric. Leave at least 1/2" of fabric on all sides for the seam allowance.
(If you are using cardboard template, center the template on your fabric, trace around it with a making pencil or chalk, then cut out 1/2 inch beyond the making for a seam allowance.)

.
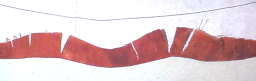
Now using the tip of your iron you want to fold the fabric over the edge of the freezer paper.
(If you are using a cardboard template, just fold over the cardboard.)

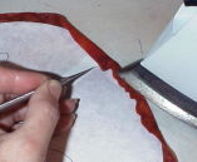
At the top of the pumpkin where there is a *inward dip* in the design, you have to make some clips in the fabric about 1/4" apart and almost to the paper.
This will allow the fabric to fan out when you press it over the paper. Otherwise, it would just bunch up.
(This goes for any appliqué pattern you are making.)
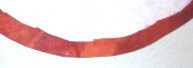
When pressing the seam allowance over, be very very careful not to get little "pleats" in the seam allowance. These cause "bumps" on the outside edge of the appliqué. See the bump?

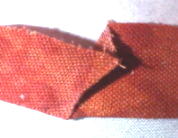
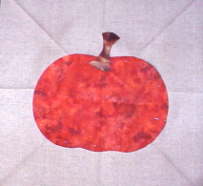
If you have a place on your appliqué where another piece will go over the seam, like the pumpkin stem will cover this top portion of the pumpkin, you don't have to turn that seam allowance under and sew there. It will be covered anyway.
See how the stem covers that area here.
I use a tiny pair of thread snips or a small pair of "sharp
to the point" scissors. You will be able to tell if it needs clipped
when the seam allowance fights you to turn over. Also, clip
if you are getting a lot of pleats and allow the fabric to overlap in the
seam allowance.
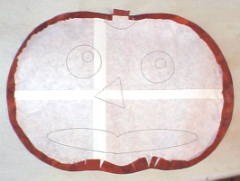
Here is the pumpkin appliqué all done and ready to sew... remember this is the back of the pumpkin.
Now, wasn't that easy? What would you rather have? A nice round jolly pumpkin or a "squared off" pieced one? I thought so....
There are some tips for placing the pumpkin here.
Iron your background square into halves then on the diagonal to form creases. These help to align your appliqué shapes.
Pin on the pumpkin using small pins. Yes, you leave in the
freezer paper.... yes, we will take it out when we are done sewing... how?...
by cutting the backing away from behind the pumpkin and pulling it out!
(can you tell I have had all of these questions before?) ...
lol...
To appliqué, use the stitch outlined in "practice hearts" page.
 If
you used cardboard for your base rather then the freezer paper, you will
have to take it out from the back of the pumpkin appliqué before
pinning it to the background fabric.
If
you used cardboard for your base rather then the freezer paper, you will
have to take it out from the back of the pumpkin appliqué before
pinning it to the background fabric.
Now, I always get... why leave the paper in? Well, it gives you a good stiff edge to appliqué against, and it keeps the appliqué from bunching up when you sew. Nothing worse than sewing along and you notice your fabric slipping and your appliqué going goofy... been there... done that!
Hey, what about that stem....
Next lesson...