
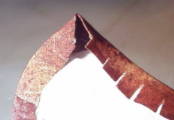
This is my stem. It has a lot of in's and out's.
All of the in's and out's have to be clipped in the seam allowance almost to the freezer paper.
Plus this shape has "corners"! Those will folded over a certain
way.
Once again use some spray starch on the seam area.
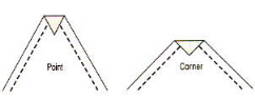
Fold point over the tip.

Fold over one edge
Fold over other side and there you have it, a nice clean and pointy
point!
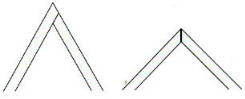
Here is my point turned over. See how nice and sharp is?
Anywhere there is a *inward curve* or an *outward curve* in the design, you have to make some clips in the fabric about 1/4" apart and almost to the paper.

This will allow the fabric to fan out when you press it over the paper. Otherwise, it would just bunch up.
(This goes for any appliqué pattern you are making.)
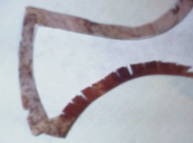
After folding over the corner, continue folding over the seam allowance on the sides.

Stitch down the appliqué in the "stacking order". In other words, in this case you will sew down the pumpkin, the vines for the leaves so the ends can go under the pumpkin stem, sew the pumpkin stem over the vine ends to hide them, then after you cut away the backing off the pumpkin, sew the face if you are putting one on your pumpkin. If you sew on the face after you remove the backing behind the pumpkin, you will have less fabric to quilt through. And remember, you have to take out that freezer paper before you sew anything on top of that fabric.
Follow the stitching guidelines
on the main appliqué page to sew your appliqués.