Step
18
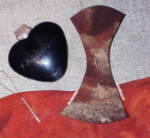 I don't have to sew the pumpkin seam allowance under beneath the stem,
so I mark the sides of the stem with some chalk. I also make a knot
right under the stem area. That way, when I cut out the fabric under
the stem, the stitches won't get cut and come loose.
I don't have to sew the pumpkin seam allowance under beneath the stem,
so I mark the sides of the stem with some chalk. I also make a knot
right under the stem area. That way, when I cut out the fabric under
the stem, the stitches won't get cut and come loose.
So anytime you have one appliqué that
goes on top of another, put a knot on the back where the appliqué
overlap will be. |
Step 19
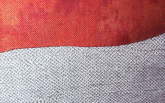 Here is my finished edge. No stitches show.
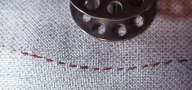
Here is the back. I put in a bobbin so you can see how close the
stitches are. The general rule that I have been told by die-hard
appliquéists about stitch length is you can have them further apart
on straighter area's but tighter in curves, points and dips. |
Step
20
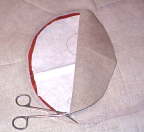 When you are done with the appliqué, make a snip in the background
very carefully. I do this by pinching the background fabric and after
making absolutely certain that is pulled away from the appliqué,
I make a snip in the background. Then trim away the background leaving
about 1/4 inch seam allowance all around.
When you are done with the appliqué, make a snip in the background
very carefully. I do this by pinching the background fabric and after
making absolutely certain that is pulled away from the appliqué,
I make a snip in the background. Then trim away the background leaving
about 1/4 inch seam allowance all around. |
Step
21
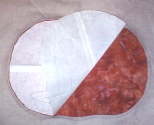
Pull away the freezer paper. It will come right off. If not, reheat
it with an iron to warm it up and it will come off. |
Step 22
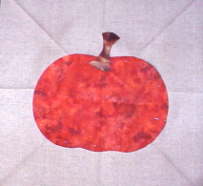 Here is my pumpkin all done with the stem pinned on.
I will do the vines next so the ends can go under the stem to hide them.
Then I will put on the stem and the leaves. The leaves will hide
the ends of the vines!
Here is my pumpkin all done with the stem pinned on.
I will do the vines next so the ends can go under the stem to hide them.
Then I will put on the stem and the leaves. The leaves will hide
the ends of the vines!
You look at the order of your pieces. Set them all on the background
and what ever is on the bottom gets sewn on first! You apply the pieces
that are on the bottom first then work toward the top pieces. Any portion
of an appliqué that will be covered by another piece need NOT be
sewn down... it will be covered anyway. So I cut away that part that
will be covered leaving a seam allowance of course.
|
Some ask if it is really necessary to cut away the backing.
It is my observation that when you cut the backing away under the appliqué,
it all lays better. If you appliqué something on and say it
is even just 1/8" or so puckered up... it will always be that way because
the fabric under it is tighter and the appliqué can't spread out...
If you cut away that back fabric behind your appliqué, the appliqué
has a chance to "relax" and it just seems to "be of one fabric" instead
of "laying on top" of another piece of fabric.
Also if you appliqué light over a darker or checked fabric
for instance, the under fabric may show through.
Experiment and see what you like... there are no Quilt Police except
for the self appointed ones... and I avoid them! |
|
Next
page 4... Making lovely thin bias stems...the
easy way!
|